ooooooooooo

BDRAG, JUST CHECKIN IN....

BDRAG

Well-known member
Lifetime Member
Joined
Aug 26, 2018
Messages
720
Points
93
Location
DALLAS AREA
Roxor Ownership
No longer own
Roxor #
:-(
04/21/2022 UPDATE:

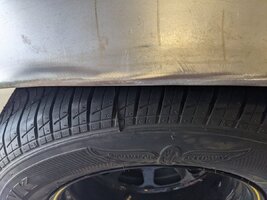
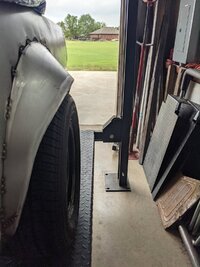
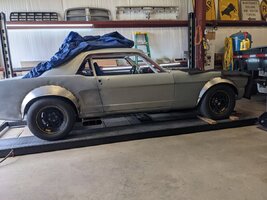
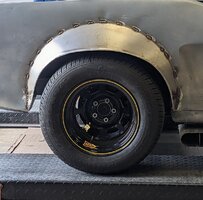
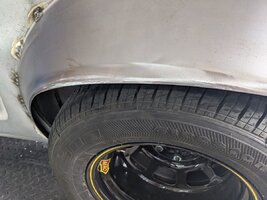
Today I finished up the rear flare hacking. I did some clean up and then re made the edge roll originally on the flare before I hacked on them. Oh my fake right thumb is killing me.

The way I do the edge forming is with a pair of lineman pliers as we call them. A pliers with a flat tip about 1/2" wide and a face that's flat back about 1/8. Then notches and then a wire cutter. I scribed out a 1/4 back from the edge of the flare then just through a bunch of clinching and releases side by side by side repeatedly. Oh my hand. Lolol.

So got the flares worked and cleaned up as far as I am for now. Did I mention hands hurt? Lololol.

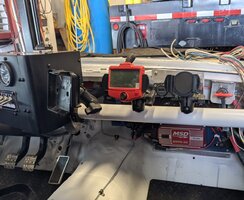
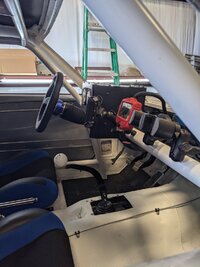
Then I mounted 3 RAM 1" ball mounts for holders for my GPS, the engine management controller and a cell phone or whatever else is needed. Mounted them on the roll cage in front of the passenger.

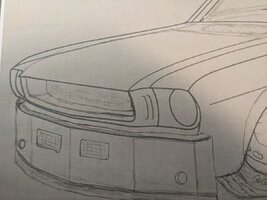
That's it for today. Tommarra I may tackle building front air dam structure using some old removed bumper supports that no longer fit since we have roll cage in the way. Lolol.

BDRAG
PXL_20220421_194513460.jpg PXL_20220421_194529135.jpg PXL_20220421_194502022.jpg PXL_20220421_204814839.jpg PXL_20220421_204810058.jpg PXL_20220421_211937354.jpg PXL_20220421_211943144.jpg
 

BDRAG

Well-known member
Lifetime Member
Joined
Aug 26, 2018
Messages
720
Points
93
Location
DALLAS AREA
Roxor Ownership
No longer own
Roxor #
:-(
04/24/2022 UPDATE:

Moving along, bouncing around.

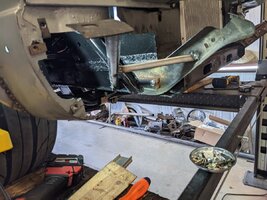
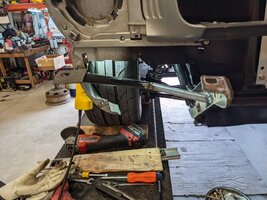
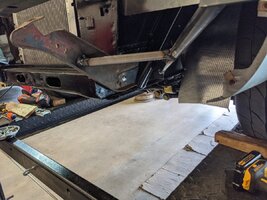
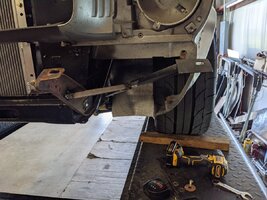
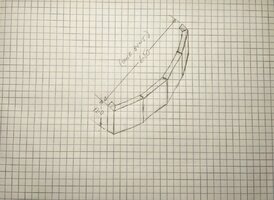
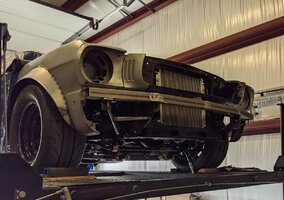
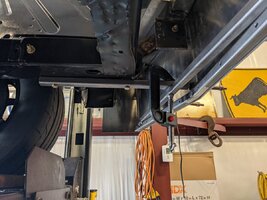
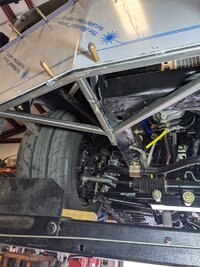
I decided to start work on designing that front Air Dam I had sketched up months ago. My thoughts are to use the existing front bumper mounts are a starting point and modify them from there. The only problem is that when we added the front down bars from the roll cage to the front lower subframe, we split the two mounting holes for the original brackets. So I had to whack them in half and reconfigure them were they attached to the frame.

So I cut them down and bolted the front half to the subframe. I then hung the front bumper with a few bumper bolts. Then I had to cut the rear half of that original mount. It was a 1-in round piece of tubing that runs from the mount near the frame out towards the corner and this is the outer mount for the front bumper.

So I got that stuff bolted to the bumper and fabricated a few pieces square two between the two just to hold everything in place for the most part.

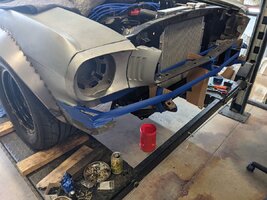
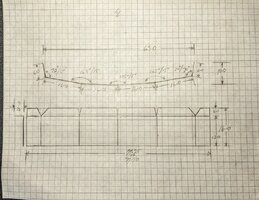
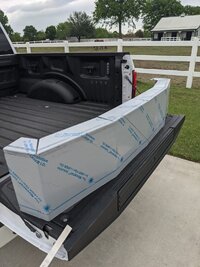
Then I remove the front bumper and started playing around with the old blue tape and cardboard to get an idea of the real shape and to be able to get some measurements to make a drawing. The air dam is going to be too large for the little bitty sheet metal break I have. I'll attach a drawing and you can see kind of what I'm doing. I'm going to get a shop to fab the sheet metal for me.

When I get it back from a sheet metal shop I will then fabricate my top support out of 2x2 square tube and I will fashion it to the shape of the sheet metal. Once I've done that I can then cut down the original bumper mounts and tack in the top support piece and start my lower support for the air dam.

I plan on making the lower support I do a purpose item. I know that at some point that I may pull up too close to a curb or catch a dip in an intersection or something like that. So I want some kind of robust structure tied to the front cross member below the radiator to take some of the brunt for so I don't fold the air dam up under the car. Fingers crossed, more to come.

BDRAG

PXL_20220422_190742393.jpg PXL_20220422_190748402.jpg PXL_20220422_190755879.jpg PXL_20220422_190800980.jpg PXL_20220423_192444658.jpg PXL_20220424_003957778.jpg PXL_20220424_003757291.jpg PXL_20220424_005600499.jpg
 

BDRAG

Well-known member
Lifetime Member
Joined
Aug 26, 2018
Messages
720
Points
93
Location
DALLAS AREA
Roxor Ownership
No longer own
Roxor #
:-(
04/25/2022 UPDATE:

I did my research today on the materials for the front air dam project. I also went by a sheet metal fab shop and got the air dam quoted. The sheet metal shop will supply the .090 aluminum sheet and form the part for $110.00! I could not believe the price. Just the aluminum sheet would have cost me $100.00 with sales tax. Did I order it? H E L L YES I did! It will be done Monday. Then I will get it plated with Black Anodize. Plater is old friend, won't ever charge me. I beg him to but he just says, Drop it off. Lolol. Okay!

I had to buy the steel 2" square bar which cost me $55 with tax. for a 10 foot piece. What a rip off! Most places won't sell less than a 20-24 foot bar. I will fit the square tubing to the air dam once its built and then mount the tube to the front supports. Then build the rest of the sub structure.

I also bought a 20 foot roll of 5" wide x 1/4" thick neoprene to close out the gap between the air dam and the ground. 1" of the rubber will be trapped between a strip of aluminum and the back side of the air dam. Just behind the strip will be sub structure that will hang just below the aluminum and will be hidden by the rubber. This will be my skid bar, rub bar for curbs and dips. The lowest hard point will be about 8" off the ground. A 4" air gap below the 4" rubber. Hope it saves the air dam. I have basically shortened the front of the car from the wheel well forward. Run a tape measure from the tire to the face of the air dam is only 16 inches. It will be a stubby nose so dips and such should clear everything. Fingers crossed! Lololol.

So I will have about $250 bucks in this project. I will be deleting the OEM front under pan below the OEM bumper, the OEM bumper, OEM turn signal bezels and the OEM close out that goes between the bumper and grill area. I can sell those parts for around $250 bucks! Lolol. All I am out will be a boat load of effort! Lololol.

I have made up a list of all the parts that were removed from the car. The claimed fresh 289 Engine, Drive line minus the drive shaft, posi-trac 3rd member, Leaf Springs, Seats, all the side glass with frames and tracks, front and rear, complete vent windows and frames with new seals. All kinds of stuff. Literally a pick up bed worth of stuff. I will be shopping it as a package deal to anyone who will come buy it all!

Ain't being retired great! Every day is a Saturday.

BDRAG
 
Last edited:

BDRAG

Well-known member
Lifetime Member
Joined
Aug 26, 2018
Messages
720
Points
93
Location
DALLAS AREA
Roxor Ownership
No longer own
Roxor #
:-(
04/26/2022 UPDATE:

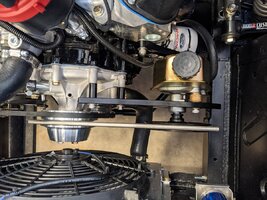
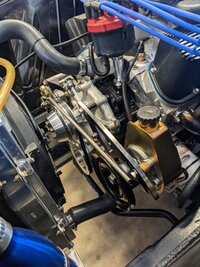
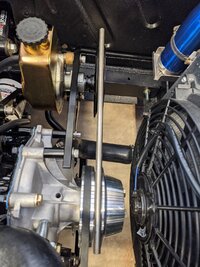
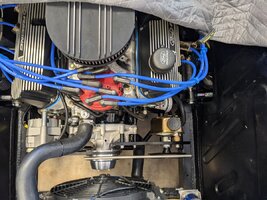
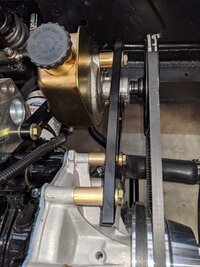
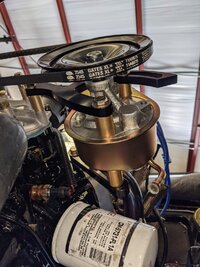
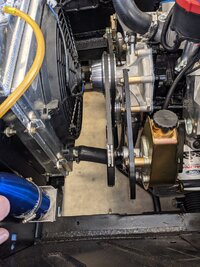
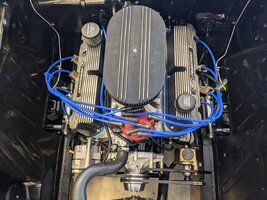
Well I ordered a Saginaw type power steering pump and a bracket that supposedly would mount it to my boss 302 off eBay. Well of course nothing just bolts up like it's supposed to and as always when you buy something from eBay there are zero and I mean zero instructions.

We first started looking at it on Saturday when sort of figured it out but we didn't have a pulley on the pump and didn't have another pump around to steal a pulley from. So I ordered an Amazon pulley for 25 bucks and got it Sunday. So today I went over and started trying to get the mounts attached to the motor and come up with a bunch of different spacers, more spacers, more spacers.

I finally got it attached and lined up with the pulley on the water pump which was not my first choice of drive options. Since the pulley I bought if turned around with the cone facing the pump would hit the attach bolts there would be no way to tighten the thing together or tighten it up once the belt was on. So I had to flip the pulley around and space the pump off the back side of the brackets and make more spacers and more spacers and more spacers. Lol lol.

So took me about 3 hours to get the thing lined up with the water pump pulley. I use my trusty piece of 3/8 tubing as my belt aligning tool as I had done on the alternator which seemed to work just fine.

So I then tore it all apart and measured all the stacks of washers and shims and whatever else I had stacked in a spacers. Now I'll go to where I used to work tomorrow and see if I can beg a lathe to make me some correct standoffs or bushings. Then I'll run down to the platers and see if they will at least Gold chem film them for me. If I make them out of stainless I won't need to have any plating. Swing by hardware store and hope I can find a correct length bolts so everything continues to match up with everything else in the engine compartment. Fingers crossed.

And once it's all mounted 100% I will then try to figure out the power steering lines and have those made. There goes another hundred bucks. Lolol.


BDRAG
PXL_20220426_203517688.jpg PXL_20220426_203521637.jpg PXL_20220426_203543397.jpg PXL_20220426_203554077.jpg
 

Roxasuras

Well-known member
Lifetime Member
Joined
Mar 10, 2019
Messages
2,099
Points
113
Location
Hurricane, WV, USA
Roxor Ownership
Roxor Owner
Roxor #
2507
Are you running just the puller fan or a pusher also? No mechanical?

All in all it looks great.
 

BDRAG

Well-known member
Lifetime Member
Joined
Aug 26, 2018
Messages
720
Points
93
Location
DALLAS AREA
Roxor Ownership
No longer own
Roxor #
:-(
Just the puller fan. The was not room for a mechanical fan and as it was I had to chop off about 1/2 inch off the water pump shaft so it would clear the electric fans shroud.

Part of all my pain in da bu tox with pulleys and stuff lining up is the fact that I am changing the radiator from a passenger side in at top and passenger side out to water pump to a cross flow type where water actually flows through the radiator veins. So I have a drivers side water pump from radiator with water to radiator on passenger side top. . OEM with both on same side has always cause running hot issues on these cars. Any car with a non cross flow type. Water has to be forced to go through the tubes of the whole radiator, not just the few closest to the in and out.

So water pumps can be a pain, radiator hoses, mounting brackets to the say alternator from the water pump bolts and so on. It changes most of the after market parts fitment. Ya just gotta push through and make S H I T! Lolol.


BDRAG
 

BDRAG

Well-known member
Lifetime Member
Joined
Aug 26, 2018
Messages
720
Points
93
Location
DALLAS AREA
Roxor Ownership
No longer own
Roxor #
:-(
04/27/2022 UPDATE:

I machined my power steering pump bushings today. Got them gold chem filmed, stopped and bought grade 8 hardware so it will all match and installed. It all fit 100%! YES!


Got a call from the sheet metal shop, air dam is ready for pick up. Sweet!

BDRAG

PXL_20220427_183020168.jpg PXL_20220427_190052479.jpg PXL_20220427_183044413.jpg PXL_20220427_184855623.jpg
 

BDRAG

Well-known member
Lifetime Member
Joined
Aug 26, 2018
Messages
720
Points
93
Location
DALLAS AREA
Roxor Ownership
No longer own
Roxor #
:-(
04/29/2022 UPDATE:

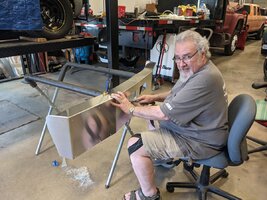
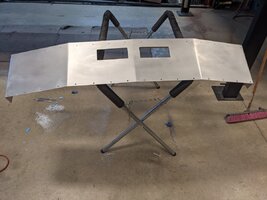
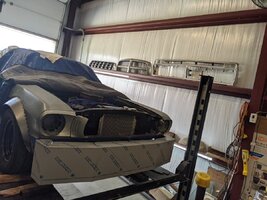
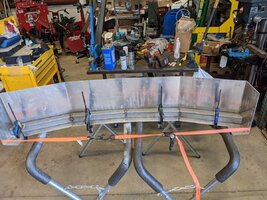
Picked up the air dam. Material is .090 aluminum, Laser cut and bent up edge and face. $100.00!!!! How the heck can a shop do that. Lol. I'm happy! I laid it up in the area it will go just to get a look. Looks like it should. Sticks out a bit but will set back more once mounted.

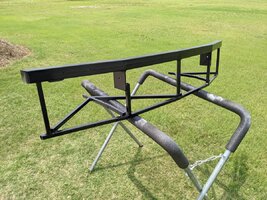
So I got it on the saw horses and laid out my 2" square tube and cut and notched it to fit the air dam inside the 90 degree bend. Clamped it and ran a strap around it to pull in the bends. It worked great.

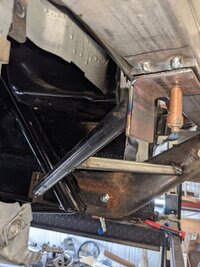
I then welded the notches on the tube closed. Then placed the tube in the general area it will be mounted. I made so mount plates and clamped them to the old bumper supports I had cut off. Then placed the tube up for fit. After about an hour of fitting, I marked existing holes in the mounts and welded on the plates.

Then I decided to weld a plate to the bottom of the tube at the ends where another support will be used that angle over to the frame. I then clamped some L angle to the plate and tube. Then tacked the angle to the support tube. Then drilled through both the angle and the plate. I will go back and tap the hole in the plate and bolt the angle to the whole shooting match.

Tommarra I will figger out the lower attach points.

BDRAG

PXL_20220428_160000113.jpg PXL_20220428_171045948.jpg PXL_20220428_191030266.jpg PXL_20220429_192744317.jpg PXL_20220429_194827367.jpg PXL_20220429_194857357.jpg PXL_20220429_194935298.jpg
 

Roxasuras

Well-known member
Lifetime Member
Joined
Mar 10, 2019
Messages
2,099
Points
113
Location
Hurricane, WV, USA
Roxor Ownership
Roxor Owner
Roxor #
2507
That looks good. What do you suppose it weights? Must be very light.
 

BDRAG

Well-known member
Lifetime Member
Joined
Aug 26, 2018
Messages
720
Points
93
Location
DALLAS AREA
Roxor Ownership
No longer own
Roxor #
:-(
The aluminum is about 10 lbs. The rest will be about another 10 lbs. It's no heavier than the OEM bumper, under pan and the upper closeout between the bumper and core support.

MAN! I gotta a lot of drilling holes coming up. Lololol.

BDRAG
 

BDRAG

Well-known member
Lifetime Member
Joined
Aug 26, 2018
Messages
720
Points
93
Location
DALLAS AREA
Roxor Ownership
No longer own
Roxor #
:-(
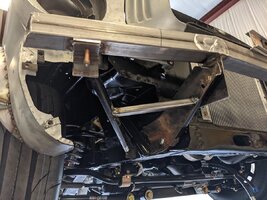
I think it kinda looks like a Cat Fish! Lololol.

BDRAG
 

BDRAG

Well-known member
Lifetime Member
Joined
Aug 26, 2018
Messages
720
Points
93
Location
DALLAS AREA
Roxor Ownership
No longer own
Roxor #
:-(
05/01/2022 UPDATE:

Well we're moving along at a snails pace. I got the air Dan clecoed in place. Added end plates to the top tube so I can tap the ends to allow for shims if needed to space the wrap around off the side of the fender.

Built a lower support tube for along the bottom edge. This will be attached with quarter inch bolts through the face of the air dam passing through quarter inch thick rubber then the 3/4 square tube and then washer and lock nuts.

Once that's all attached to the bottom of the air dam it can then be bolted up with the assorted attach points I've been finagling with all day. I want to be able to take this thing off if it gets smashed too bad on a big dip or a curb. I won't be able to take it off and attempt to fix it if it ever happens. I'm hoping 8 in is enough off the ground.

Pete worked on figuring out my lighting which will be running through a toggle switch like the rocks are has for high and low beam and center position off. The trick is wiring all the turn signal and marker lights along with those low and high beam LED lights have purchased.
Have I ever mentioned I hate freaking wiring? Might have it driving next weekend with lights who knows?????

BDRAG

PXL_20220501_201208583.jpg PXL_20220501_201201900.jpg PXL_20220501_201225631.jpg
 

BDRAG

Well-known member
Lifetime Member
Joined
Aug 26, 2018
Messages
720
Points
93
Location
DALLAS AREA
Roxor Ownership
No longer own
Roxor #
:-(
05/03/2022 UPDATE.

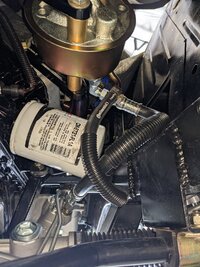
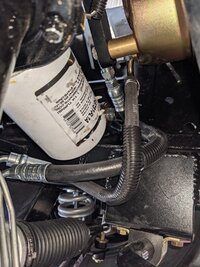
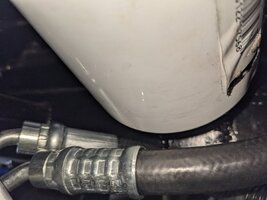
Ok, today we finally got the power steering fitting that was ordered last Thursday. Once installed I got the lines installed and protective sleeving added at any contact areas with the frame. The lines barley clear the filter for maintenance but it do! Got the fluid in and bleed. It actually works! Lolol.

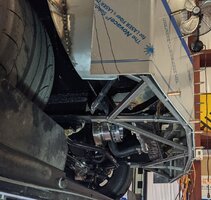
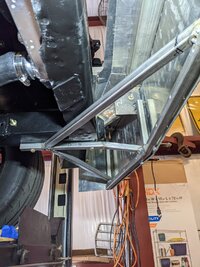
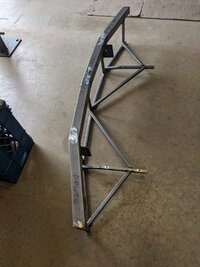
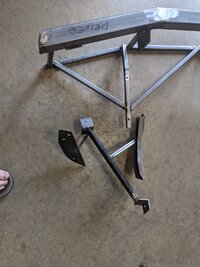
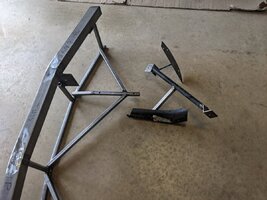
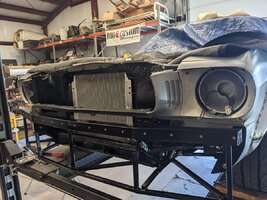
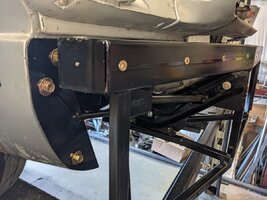
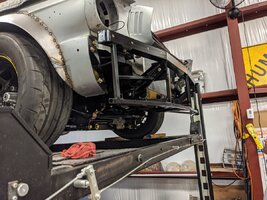
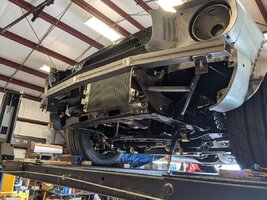
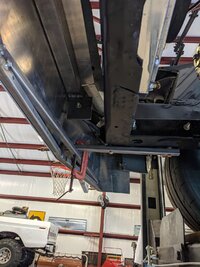
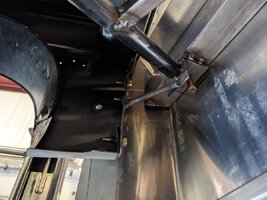
Then I finished up the air dam structure and tie in points.

Black areas will be holes for air to lower radiator. Still have to 100% weld it all on the bench.


BDRAG
PXL_20220503_185600346.jpg PXL_20220503_185611708.jpg PXL_20220503_185644143.jpg PXL_20220503_225139461.jpg PXL_20220503_211438951.jpg PXL_20220503_210207179.jpg PXL_20220503_210135558.jpg PXL_20220503_210152988.jpg
 

BDRAG
Well-known member
Lifetime Member
Joined
Aug 26, 2018
Messages
720
Points
93
Location
DALLAS AREA
Roxor Ownership
No longer own
Roxor #
:-(
05/04/2022 UPDATE.

Got the air dam disassembled and welded up 100%. Then got it cleaned up and painted. Taped a few holes . With the aluminum skin, it weighs about 30 lbs. Bout the same as bumper, lower rock pan and behind bumper closeout weighs.

BDRAG
PXL_20220504_160340885.jpg PXL_20220504_164324378.jpg PXL_20220504_164327336.jpg PXL_20220504_192352261.jpg
 

BDRAG
Well-known member
Lifetime Member
Joined
Aug 26, 2018
Messages
720
Points
93
Location
DALLAS AREA
Roxor Ownership
No longer own
Roxor #
:-(
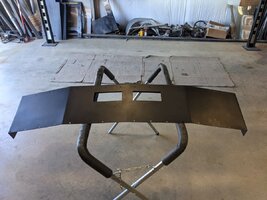
05/05/2022 UPDATE:

Got the air dam structure bolted in. Took about 2 minutes. 8 screws. Yehaww!

Installed the threaded inserts in the top tube that the aluminum skin will attach into. Finish routed the air inlet holes I had roughed in. Then did a test fit. Bolted right up. Yehaaww again! Lololol.

Removed it. Sanded and filed all the edges. DA sanded any scuffs and scratches. The DA sanded with scotch Brite pad. It's going for black anodize in the morning.

Pete got the tail lights sorted out and screwed on. Installed new sockets for the bulbs.

BDRAG
PXL_20220505_223023999.jpg PXL_20220505_223121995.jpg PXL_20220506_012706226.jpg PXL_20220506_003248164.jpg PXL_20220506_011213628.jpg PXL_20220506_011659489.jpg
 

BDRAG
Well-known member
Lifetime Member
Joined
Aug 26, 2018
Messages
720
Points
93
Location
DALLAS AREA
Roxor Ownership
No longer own
Roxor #
:-(
05/06/2022 UPDATE:

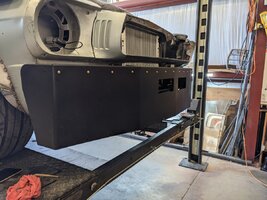
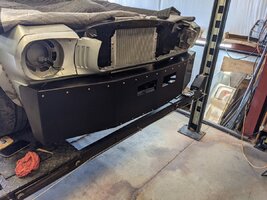
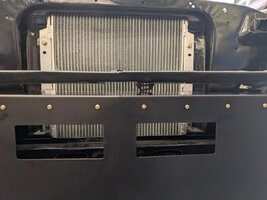
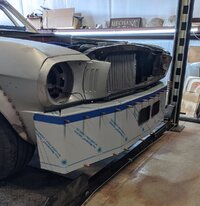
Got the air dam platted. Got the structure mounted in about2 minutes and screwed on the aluminum skin with just the top row of fasteners. Man O man it looks exactly like I envisioned.

Going to build a radiator guard from some 1/2" expanded aluminum sheet. Not sure if I will also add one to the lower air vents.

BDRAG
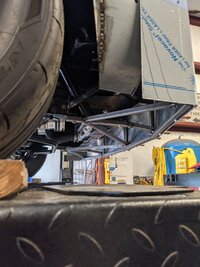
PXL_20220506_182101642.jpg PXL_20220506_184004177.jpg PXL_20220506_184025793.jpg PXL_20220506_184942616.jpg
 
Top