ooooooooooo

BDRAG, JUST CHECKIN IN....

BDRAG

Well-known member
Lifetime Member
Joined
Aug 26, 2018
Messages
720
Points
93
Location
DALLAS AREA
Roxor Ownership
No longer own
Roxor #
:-(
I drive a Thunderjet 8100 Vortec (496) jet boat which has the same heat vapor lock issue. If it's been running and you shut down for 10-20 minutes it vapor locks and runs like a choke is on. If you start it sooner or wait a little longer for it to cool down it is fine. Good luck figuring yours out.
Thanks for the info. I want to cut some vent holes and dimple them in the hood but have mixed emotions about the look. Lol. I am running the fuel filters as per the installation manual. One before the fuel pump out of tank and one up front which is on the fire wall. The one on the fire wall is larger. I think I am going to relocate it back down the line out of the engine heat area. I would put it near the rear but then there is the chance of contaminants from the long fuel run getting into the throttle body. I may insulate it first and see how it acts. Its real convenient where it is.

BDRAG
 

Farmer78

Member
Joined
Dec 29, 2021
Messages
38
Points
8
Location
Texas South Plains
Just a fun fact. Dad had a 1956 Ford grain truck with a v-8 that would vapor lock. When he used it in the fall, he would cut a canalope and put the rine over the fuel pump to insulate it. It would run for a while and then he would have to replace the rine.
 

BDRAG

Well-known member
Lifetime Member
Joined
Aug 26, 2018
Messages
720
Points
93
Location
DALLAS AREA
Roxor Ownership
No longer own
Roxor #
:-(
Just a fun fact. Dad had a 1956 Ford grain truck with a v-8 that would vapor lock. When he used it in the fall, he would cut a canalope and put the rine over the fuel pump to insulate it. It would run for a while and then he would have to replace the rine.
Sweet smelling fix! lololol.

BDRAG
 

1BB

Member
Joined
Nov 9, 2019
Messages
47
Points
18
Location
Church Point, LA, USA
Roxor Ownership
Looking to buy
Well today we did a little drive by video so you can hear that wonderful retro exhaust note that I was so trying to achieve.
I suggest ear buds or my favorite, headphones. Enjoy!


BDRAG
Boy, if that doesn't get you grinning like a rat eating cheese, nothing will. I LOVE this build.

On the vapor lock issue, I see your carb sits right on the intake, and I have no doubt that's your vapor lock issue. When you shut your engine off, the coolant stops circulating, and all that engine heat goes UP, and starts to boil the fuel in your float bowl, and that's where you're getting your vapor lock from.

Try letting your engine idle for two minutes before shutting it off, and allow that coolant to dump more heat into the radiator.

If it still keeps locking up on you, add an insulating spacer between your carb and intake and that will fix your problem.

Some thing like this....
 

BDRAG

Well-known member
Lifetime Member
Joined
Aug 26, 2018
Messages
720
Points
93
Location
DALLAS AREA
Roxor Ownership
No longer own
Roxor #
:-(
Boy, if that doesn't get you grinning like a rat eating cheese, nothing will. I LOVE this build.

On the vapor lock issue, I see your carb sits right on the intake, and I have no doubt that's your vapor lock issue. When you shut your engine off, the coolant stops circulating, and all that engine heat goes UP, and starts to boil the fuel in your float bowl, and that's where you're getting your vapor lock from.

Try letting your engine idle for two minutes before shutting it off, and allow that coolant to dump more heat into the radiator.

If it still keeps locking up on you, add an insulating spacer between your carb and intake and that will fix your problem.

Some thing like this....
Well 1BB, I actually have an MSD Atomic 2900 fuel injection set up that still has the ole double pumper look to it even though its a so called throttle body. I am running a Edelbrock Airgap intake which has a decent air gap between the base of the injector and the valley to help keep the runners as cool as possible. I am also goin to relocate the fuel filter or at least insulate it and see where it goes from there.

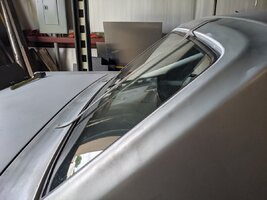
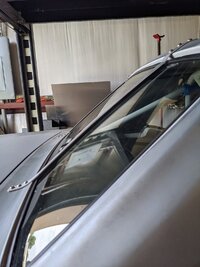
I'm glad your enjoying the build. I just sit and grin every time I figger somptin out to add. I don't have pics but today I started the windshield hold down tabs to keep the front windshield from blowing out if I happen to swap ends at speed. I will also be adding two vertical straps on the rear window to help keep it in since I will not be having any side windows.

BDRAG
 

1BB

Member
Joined
Nov 9, 2019
Messages
47
Points
18
Location
Church Point, LA, USA
Roxor Ownership
Looking to buy
Well 1BB, I actually have an MSD Atomic 2900 fuel injection set up that still has the ole double pumper look to it even though its a so called throttle body. I am running a Edelbrock Airgap intake which has a decent air gap between the base of the injector and the valley to help keep the runners as cool as possible. I am also goin to relocate the fuel filter or at least insulate it and see where it goes from there.

I'm glad your enjoying the build. I just sit and grin every time I figger somptin out to add. I don't have pics but today I started the windshield hold down tabs to keep the front windshield from blowing out if I happen to swap ends at speed. I will also be adding two vertical straps on the rear window to help keep it in since I will not be having any side windows.

BDRAG
I bet you do sit there smiling. I know back in the early 80's, I was a certified auto mechanic, and for fun I always helped my buddies build their engines for whatever it was they were building at the time. It was so much fun, and firing up an engine for the first time, NEVER got old.

That throttle body fuel injection, that too can vapor lock on you. If it were me, I'd start the process of elimination with that, and then work back from anything that touches or is close to the engine. Try taking a bag of ice, and put it on the throttle body the next time you have trouble starting your engine and see if that resolves the problem in a couple minutes or so. If it does, add in one of those insulating spacers. Typically the problem is where it's the closest to the heat source.

I mean you know your engine better than anyone, so I may be waaaay off base here too. When you do figure it out, let us know, so I can log it away in my brain for future use.

I remember years ago my mom's vehicle would run fine for an hour or two or more, but then started dying. It would idle but not go over a few miles an hour. Let it sit for 20 minutes and it ran fine for another hour or so and the same thing happened. It would idle all day long with no problem, start right up hot or cold, but had no power after a couple hours. It took me several days to figure out it was the vent in the fuel cap that was plugged, and as she burned fuel, it created a vacuum in the fuel tank. At idle it would suck in juuuust enough air to displace the fuel being pulled from the tank to keep the engine running, but when more fuel was needed at highway speeds, she couldn't suck enough fuel to provide the needed power, and thus start slowing down and dying out.

You need basically three things for an engine to run, fuel, ignition and compression, and it is just a process of elimination to find the problem, but I think fuel can be the trickiest to figure out at times since it's not mechanical, and you can't use a test light or meter to troubleshoot it.
 

BDRAG

Well-known member
Lifetime Member
Joined
Aug 26, 2018
Messages
720
Points
93
Location
DALLAS AREA
Roxor Ownership
No longer own
Roxor #
:-(
I bet you do sit there smiling. I know back in the early 80's, I was a certified auto mechanic, and for fun I always helped my buddies build their engines for whatever it was they were building at the time. It was so much fun, and firing up an engine for the first time, NEVER got old.

That throttle body fuel injection, that too can vapor lock on you. If it were me, I'd start the process of elimination with that, and then work back from anything that touches or is close to the engine. Try taking a bag of ice, and put it on the throttle body the next time you have trouble starting your engine and see if that resolves the problem in a couple minutes or so. If it does, add in one of those insulating spacers. Typically the problem is where it's the closest to the heat source.

I mean you know your engine better than anyone, so I may be waaaay off base here too. When you do figure it out, let us know, so I can log it away in my brain for future use.

I remember years ago my mom's vehicle would run fine for an hour or two or more, but then started dying. It would idle but not go over a few miles an hour. Let it sit for 20 minutes and it ran fine for another hour or so and the same thing happened. It would idle all day long with no problem, start right up hot or cold, but had no power after a couple hours. It took me several days to figure out it was the vent in the fuel cap that was plugged, and as she burned fuel, it created a vacuum in the fuel tank. At idle it would suck in juuuust enough air to displace the fuel being pulled from the tank to keep the engine running, but when more fuel was needed at highway speeds, she couldn't suck enough fuel to provide the needed power, and thus start slowing down and dying out.

You need basically three things for an engine to run, fuel, ignition and compression, and it is just a process of elimination to find the problem, but I think fuel can be the trickiest to figure out at times since it's not mechanical, and you can't use a test light or meter to troubleshoot it.
One thing we have to remember is, every time you flick on the power toggle, the injector squirts a start shot. Like yesterday, I was working on a phantom power issue in my fuel gauge. All the dash pods light up every time power is flicked. The gas gauge may or may not energies. Start it and in about 3 seconds it comes on. WTF. I think it's actually in the gauge. I have looked and eliminated the complete harness.

Anyway, on, off, on ,off dicking around with that, the fuel was added to intake. Car then did not like starting right up. Flooded the crap out of it.

What we have discovered is if the engine is flooded, you hold the pedal to the floor, hit the starter and the system knows not to add fuel. Vroom it lites, let off the gas and it is back to normal function. So knowing that has for the most part eliminated the warm starts.

Still I will look into the spacer and the the things to keep heat out of the fuel lines

Also, the tank can't vapor lock. I have a vent line which does have a roll over valve in it but I modified it so it's only about 90% able to stop air coming into the tank or vacuum.

Keep watching, more to come. Hope to finish the windshield and back glass retainer clips today.

BDRAG
 

BDRAG

Well-known member
Lifetime Member
Joined
Aug 26, 2018
Messages
720
Points
93
Location
DALLAS AREA
Roxor Ownership
No longer own
Roxor #
:-(
06/05/2022 UPDATE:

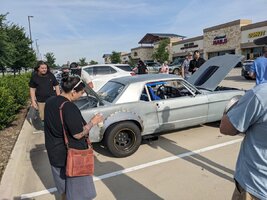
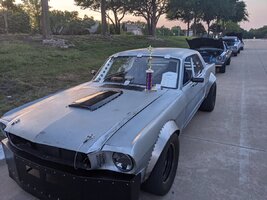
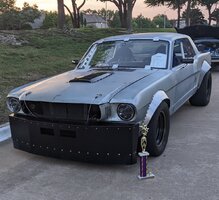
Well we to the car to an early morning car show at a local coffee shop where there was about 50 or 60 cars. We arrived slightly late so we parked down on the far end as we drove into the parking lot. As we started to exit there were about 12 or 15 people walking over to check out the mustang. It was like a zombie apocalypse movie. These people were walking towards us with their phones in front of their faces filming as they came up to check out the car. Lololol.

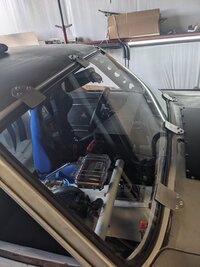
After that show which we stayed at for about an hour was over we headed back to Pete's where I've fabricated and installed the front windshield holding clips and I got Pete lined out on fabricating and installing the outside door handle blank off plates.

After we cleaned up we decided to make another car show that was from 5:00 till 9:00 p.m. . We arrived around 4:30 to find a very full parking lot of about 60 or 70 cars. Many of these were really nice cars, classic cars, custom built newer cars, and lots of muscle cars from the '60s and '70s. So we fit right in.

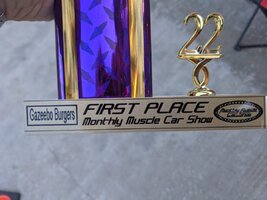
Met a few decent folks and somehow I managed to win first place in the mustang class beating out a Chip foose built, overhauling show 2015 mustang. I bet he was hot! Lololol. It was a long day and it wore this old person out.

BDRAG

PXL_20220604_134400700.jpg PXL_20220604_143640395.jpg PXL_20220604_181245603.jpg PXL_20220604_194758300.jpg PXL_20220604_195004965.jpg PXL_20220604_220422191.jpg PXL_20220605_011925289.jpg PXL_20220605_012158058.jpg PXL_20220605_012209525.jpg
 

BDRAG

Well-known member
Lifetime Member
Joined
Aug 26, 2018
Messages
720
Points
93
Location
DALLAS AREA
Roxor Ownership
No longer own
Roxor #
:-(
06/07/2022 UPDATE:

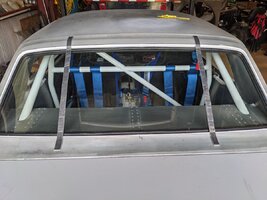
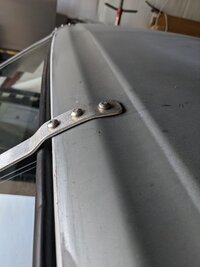
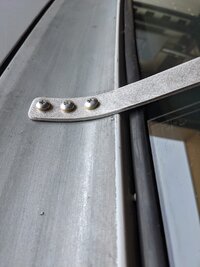
Well, I spent today fabricating the rear window hold in straps. I had a 1" wide strip of 1/8" aluminum I had for another project which was not used.

I spent 3 hours shaping it fitting it to the double conure on the rear roof and the curve of the rear cowl. Bent them a little bit at a time in my break. This left many scuffs on the face that will show. So after fitting I had to sand and work out all those marks.

Then laid out the hole pattern. Then drilled the straps and then attached them drilling and using cleco's. Up size my holes in the car and installed 10-32 rivet nuts after priming the holes.

Up drilled the strap holes, de burred the holes and screwed them on. Woohoo they fit. So then I cut 2 1" wide strips from the left over air dam skirt rubber that is 1/4" thick. Sprayed the rubber and the mating surface of the strap with some high tack 77 glue. Stuck on the rubber and installed. Woooohooooo again! Lololol. Done with that crap. Rubber fits snug against the glass from end to end. Perfect!

They look slightly crocked from the rear but they are not. I think it's the roll cage cross bar that gives the allusion. Lol. They are the same as one another, if tipped in at the top, they are the same. Lolol.

BDRAG

PXL_20220607_172914516.jpg PXL_20220607_172925944.jpg PXL_20220607_172931764.jpg PXL_20220607_190325587.jpg PXL_20220607_190327876.jpg PXL_20220607_204918411.jpg
 

BDRAG

Well-known member
Lifetime Member
Joined
Aug 26, 2018
Messages
720
Points
93
Location
DALLAS AREA
Roxor Ownership
No longer own
Roxor #
:-(
06/20/2022 UPDATE:

It's been a few weeks since I last posted. Several things good and bad.

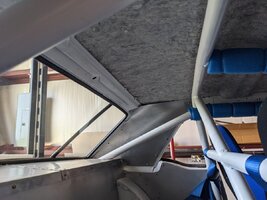
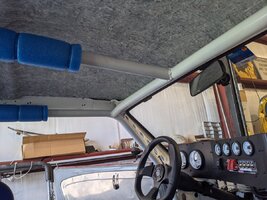
Headliner: The good, I cut and glued in a 1/2 inch thick Felt headliner. I ordered an 10' x 8' rug pad. Cheap. The roxor had a aftermarket metal roof which had a 1/2" thick padding, like felt, not sure exactly what it was. It worked great keeping heat off the head and upper body.

The bad: After a long day at the front end alignment place, the car sat for 5 hours out in the sun. 102 degrees when I left the shop at 1:15 pm. The headliner had started to detach. Errrrrrr. I pounded it back several times on the way home. I finally had to just pull over because it had dropped down across the rear window and I could not see out back. I pulled over and ripped the S H I T out completely. Errrrrr. I will research a heat resistant glue. Do not use 3M spray 77 in a hot area.

Now the front end alignment.

Everyone in the area says, Take It To Garland Safety Lane. The place has been there since 1954. I was told they open at 7:00 so get there a little early because it's first come first serve. So I show up at 7:05 and I am the 14th car in line. Crap!

So I patiently wait my turn as one after another car goes on the rack and stays on the rack. An example is an F-250 rolls on a rack and a guy jumps underneath while someone else inside turns the steering left and right. They call out a few commands and immediately call the owner and tell him this and that and this and that is wrong and it'll be this much. I'm thinking oh my gosh this is a scam place.

Turns out it costs a guy about 350 bucks to have all of his tie rod ends replaced, a shock put on the steering rod and grease the entire front end. Front end alignment. I'd say it's a hell of a lot cheaper than the Ford dealer would have charged.

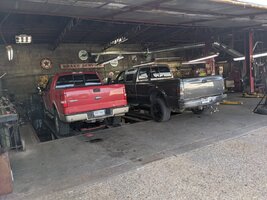
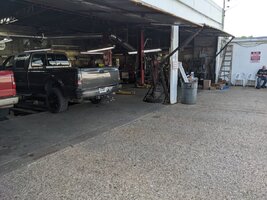
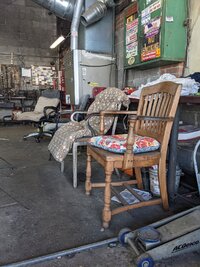
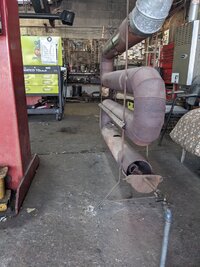
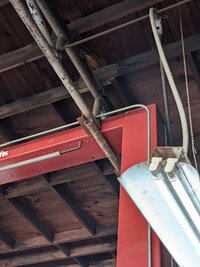
So as I said this place has been there since 1954 and I don't think it has been cleaned but maybe once in 60 something years. I'll post a few pictures of the shop it's like a time capsule of the past.

I finally got my car in and the guy does the front end alignment manually, with old school stick to the wheel fixtures and some kind of a bubble gauge thingamajig. He makes some adjustments and then goes and drives the car. He comes back says it's not quite right and he makes more adjustments. Oh yes I forgot I had to go in under the car with him and help lift it up so he could get his bottle jack under it to make his adjustments.

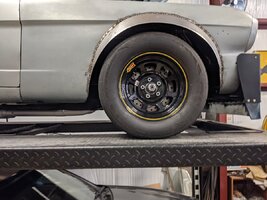
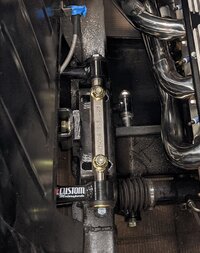
After the third drive he had it where he wanted it. After returning home the car does drive wonderful. I bumped up to 120 miles per hour with no issues and handling. Once home I open the hood and noticed how much adjustment he had made on the upper a-arms. Most of the adjustment on one slot was inboard and the other was outboard. Meaning that he moved the upper a arm about 2 inches aft at the spindle.

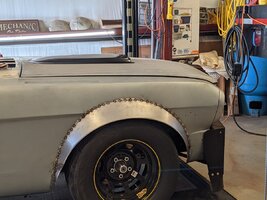
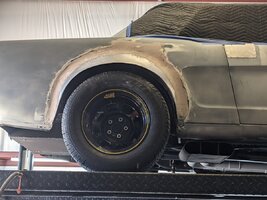
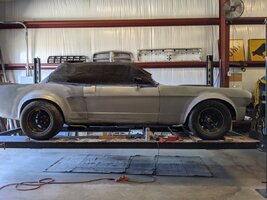
So that was the good, now here's the bad. Because he moved the upper arm aft by about 2 inches, there was a tire rub on the rear side of the fender opening. So I found where the rub was I reworked the flares and the fender opening and did some welding and some chopping. The only problem now is the wheel is not in the center of the wheel opening, I repeat, IS NOT IN THE CENTER OF THE WHEEL OPENING.

That makes me very glad that I never painted the car. But it irritates the hell out of me because I can't stand stuff that is crooked or not centered. Most people won't notice it but I will. The only solution is to buy new pop fenders for $300 or $400 or cut the flares out completely and start over with the same fender which will be a pain in the ass.

So for now I'm going to drive the car un painted and see what kind of comments I get and see who notices. It looks a lot better after I reworked it and I don't have any clearance issues but damn it!

I hit another cars and coffee on Sunday and everyone still loves a car and no one noticed the wheel not centered in the front wheel wells. I told several people about it they looked at me like I was crazy so maybe I'll just live with it. Lolol.

THE LESSON: I have never built a car before. When we did the front suspension we set it up basically centered on the adjustments thinking we were worried more about camber, being the angle that the wheel tips in or out at the top versus the bottom, not caster which is the axis that the spindle rotates on, example like tipping the top of the spindle aft for more caster or tipping the spindle at the top forward for less caster.

I don't know all the different setups for front end adjustments. I know a lot of cars use shims. With this one, it just uses slots and two bolts. And I will post a picture of what the car looked like as we built it and what it looked like after the front end alignment and you will see the positioning difference. Now figure that upper a arm being rotated on an axis at the point where it is tied in and figuring it's about 8 inches to where the spindle attaches and you will see how much movement the top half of the wheel made aft.

So never figure your wheel opening sizes for clearance, flares or any opening treatments until after you've had the front end on the vehicle aligned properly.

It will be in the hundreds all week so I don't know how much I'm going to get done on the car. But if I don't reinstall the felt I will use some of the foam insulation that has a shiny side on one surface as a heat barrier and see if that works better. It's damn sure a bit lighter than the felt so maybe it won't fall down.

BDRAG
PXL_20220614_154101309.jpg PXL_20220614_154106110.jpg PXL_20220618_200737962.jpg PXL_20220509_224520459.jpg PXL_20220616_194749942.jpg PXL_20220126_200411501~2.jpg
 
Last edited:

BDRAG

Well-known member
Lifetime Member
Joined
Aug 26, 2018
Messages
720
Points
93
Location
DALLAS AREA
Roxor Ownership
No longer own
Roxor #
:-(
Pictures of the alignment shop.

I told a friend who I worked for in the late 70's and early 80's who still has a race car shop. He said, did you take it to Garland Safety Lane? I said yes. His response was, best place around. They have done ALL of my sedan race car alignments since 1977. Good enough for me. Lol.

BDRAG

PXL_20220616_130429251.jpg PXL_20220616_130430773.jpg PXL_20220616_135515342.jpg PXL_20220616_135524733.jpg PXL_20220616_141030198.jpg PXL_20220616_130445560.jpg PXL_20220616_134135437.jpg
 

BDRAG

Well-known member
Lifetime Member
Joined
Aug 26, 2018
Messages
720
Points
93
Location
DALLAS AREA
Roxor Ownership
No longer own
Roxor #
:-(
06/22/2022 UPDATE:

Nothing major, freaking HOT !
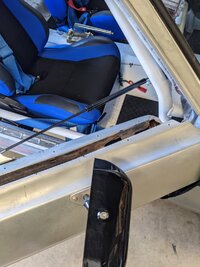
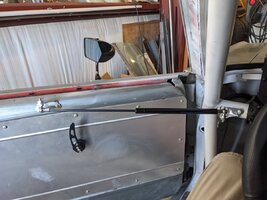
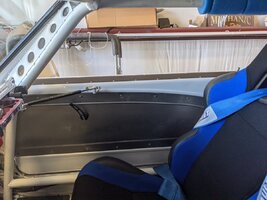
So the little time I get in I do small stuff. Yesterday I added gas struts to the doors to open/keep open for exiting/ door stop. Work great! I'll try and attach a short video.

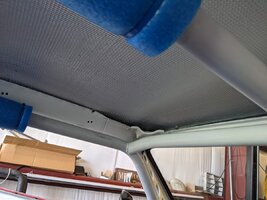
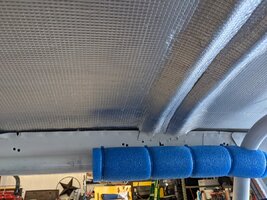
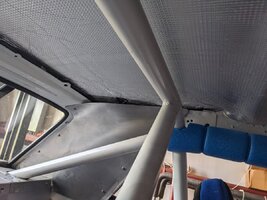
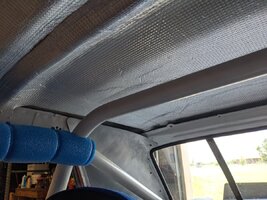
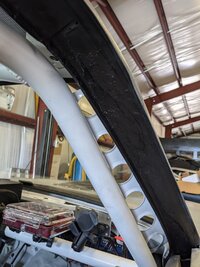
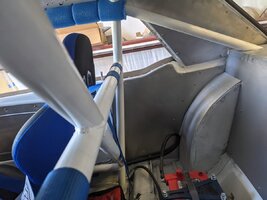
Then I installed some foam with an aluminized or metal coating on the inner roof the car. I had to seam two pieces together. So I did the seam on the roof support rib. Came out ok. Not great but ok.

BDRAG


PXL_20220621_154908298.jpg PXL_20220621_154917699.jpg PXL_20220621_162706138.jpg PXL_20220622_181028295.jpg PXL_20220622_181036443.jpg PXL_20220622_181047358.jpg PXL_20220622_181053318.jpg
 
Last edited:

BDRAG

Well-known member
Lifetime Member
Joined
Aug 26, 2018
Messages
720
Points
93
Location
DALLAS AREA
Roxor Ownership
No longer own
Roxor #
:-(
06/27/2022 UPDATE:

Been so hot and I'm an old gimp fart so not much done. However today it was only 90* out so I got 4-5 hours in.

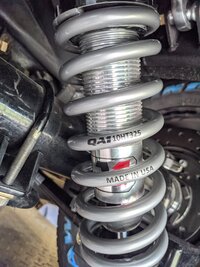
I bought some stiffer coil springs for the rear coilovers, I went from 250 lb that the set up came with and I went with 325 lb. I had cranked the spring compression up on the 250s to try and eliminate a little bit of body roll on transition which was causing a slight rub of the tire. This jack the back of the car up about an inch which I did not like. So going with the 325s I was able to install those on the shock and just set the lock rings down on the spring without it being compressed.

Once I let the car down jumped around on it a little bit to move it up and down it sat where it needs to and it is much stiffer so that should help mitigate some of the transition issues. I also backed the compression setting down by about 5 or 10%. We will see what it does probably tomorrow if it doesn't rain.

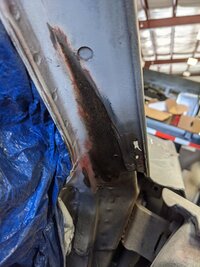
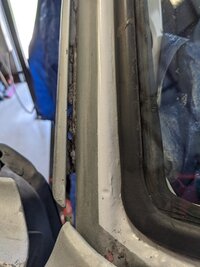
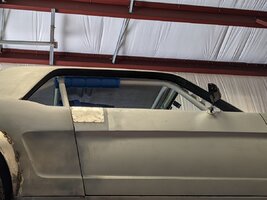
Then I worked on removing some really bad rust that was in the front a pillar area on both sides of the car. The rust was between where the rain gutter section of metal was welded to the a pillar section of metal and it just corroded like crazy between the layers. So I cut out the top layer and wire brushed and ground away the rust as much as I could. I then prime the area and after it was dry I filled in the area that was now cancer looking with a spatula and some seam filler, you know, automotive tub caulk they cost three times what tub caulk cost. Lol.

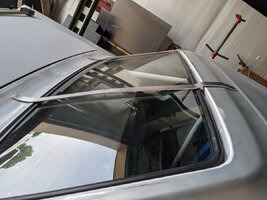
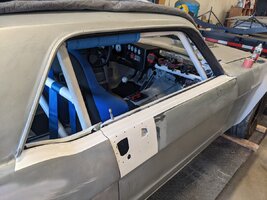
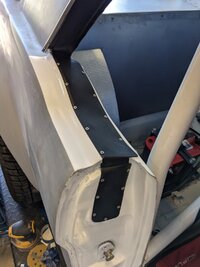
I then smoothed it out in the rain gutter side and I primed the area over the sealer after it was dry. Painted it flat black because it hides all the crap that I left and didn't feel like sanding on. I went ahead and painted the hole window surround. It'll look good when I get the black anodized strips on top of the door that close out where the window used to go.

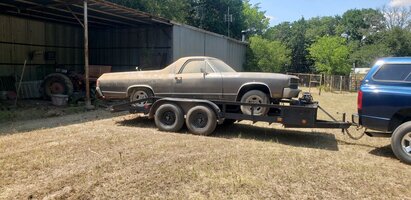
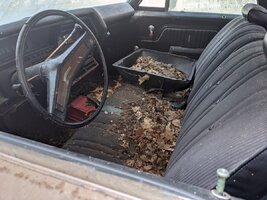
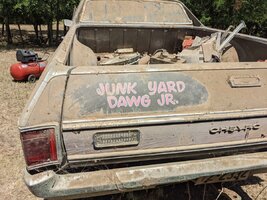
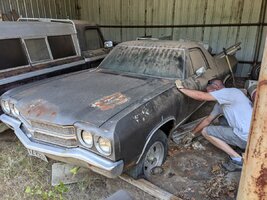
On another note, we picked up a couple of barn find vehicles over the weekend. Actually one and we're picking up the second one this Saturday. We snagged a 1970 El Camino which is got about a foot and a half of rat crap and leaves inside but the body is in fantastic shape but dirty because it's been sitting in a barn for 20 years, a pole barns at one side was open to the weather. The other vehicle is a 1966 short bed F100 Ford pickup with a camper of the period. It's been setting there for 20 years as well. No title on the El Camino but there will be a title on the Ford truck.

Anyone want to comment on what the El Camino may be worth I'd be glad to hear it. I'll post a picture of it on a trailer but remember it's full of rat *hit but there is no rust. Oh and no motor training. The guy had pulled the motor and had it rebuilt and put back together and was waiting to put it in when he died. That's why the car is set for 20 years. He owned a small auto salvage yard and that's where the motor was. When he died his son sold off all the crap that was at the scrap yard and did not want the El Camino so it's sat since then.

BDRAG
PXL_20220628_210135482.jpg PXL_20220628_180316242.jpg PXL_20220628_180325919.jpg PXL_20220628_210159906.jpg PXL_20220628_211419795.jpg 20220626_152048.jpg PXL_20220626_212304408.jpg PXL_20220626_201247484.jpg PXL_20220626_193720181.jpg
 

BDRAG

Well-known member
Lifetime Member
Joined
Aug 26, 2018
Messages
720
Points
93
Location
DALLAS AREA
Roxor Ownership
No longer own
Roxor #
:-(
07/10/2022 UPDATE:

Well been busy. Not on car! Lol. This week EVEN though it's been 100-105 I have started on the body work finally. Been going in early to beat the heat.

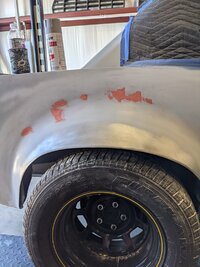
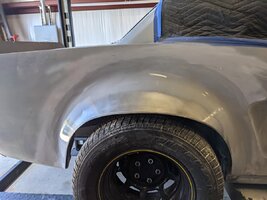
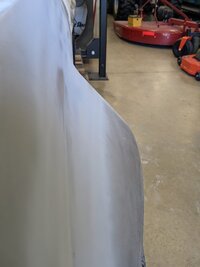
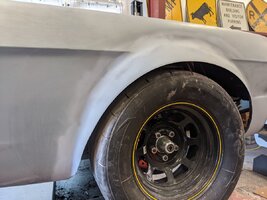
Started blending in the fenders into the flares. Sanded, roughed up area. Used glass filled Bondo to fill in the caverns we carved out the 3/8 thick freaking Bondo to weld the flares on.

Sanded that down and applied regular Bondo. Sanded that after 24 hours dry time. Then applied glazing compound to the pits and low spots.

So got the passenger side flares done and primed. Got the driver's side filled and bondoed up. Now it will dry and be ready to sand tommarra.

So when done I'll have probably 25-30 hours in just blending and filling. I'll have Popeye arms by the time I'm done. Lololol.

PXL_20220709_153102796.jpg PXL_20220710_161534975.jpg PXL_20220710_172058879.jpg PXL_20220710_155913641.jpg PXL_20220710_192400132.jpg PXL_20220710_192423716.jpg PXL_20220710_192540941.jpg
 

BDRAG

Well-known member
Lifetime Member
Joined
Aug 26, 2018
Messages
720
Points
93
Location
DALLAS AREA
Roxor Ownership
No longer own
Roxor #
:-(
07/13/2022 UPDATE:

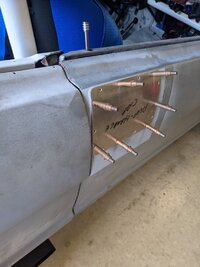
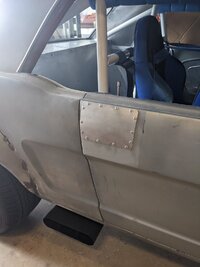
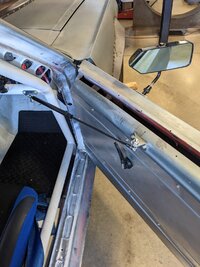
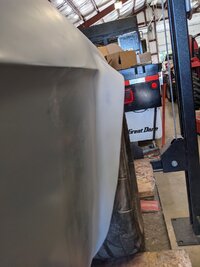
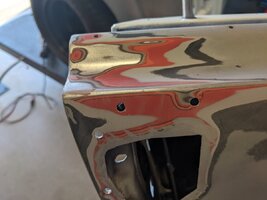
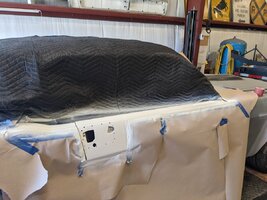
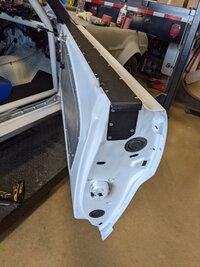
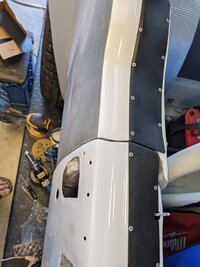
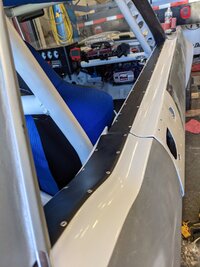
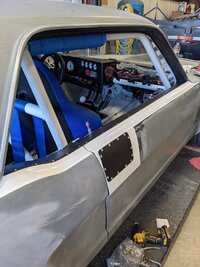
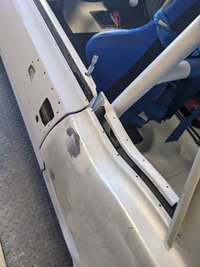
Spent my 4 hours, pre 95 degrees this morning sanding the top outer edge of passenger door. Then primed and painted the area. I wanted to get my black anodized aluminum strips I made back in September pop riveted on to close out the top of the door and the holes in the door jamb area where the windows were eliminated. Then pop riveted the door handle delete plate. It all went on with only one hole needing to be chased.

Doing the drivers side tommarra.

BDRAG
PXL_20220713_124312844.jpg PXL_20220713_132528137.jpg PXL_20220713_132846526.jpg PXL_20220713_150500450.jpg PXL_20220713_150508807.jpg PXL_20220713_150545771.jpg PXL_20220713_150556876.jpg PXL_20220713_151424448.jpg PXL_20220713_160823702.jpg PXL_20220713_160829633.jpg PXL_20220713_160756052.jpg
 

BDRAG
Well-known member
Lifetime Member
Joined
Aug 26, 2018
Messages
720
Points
93
Location
DALLAS AREA
Roxor Ownership
No longer own
Roxor #
:-(
07/17/2022 UPDATE:

Well not much going on since I got the window and door delete strips installed. TOOOOO DAMN HOT!!!! Pete's building gets up to 95-100 inside by 10:00 am right now. NOT gonna try and do body work and paint in this heat.

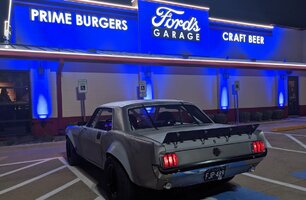
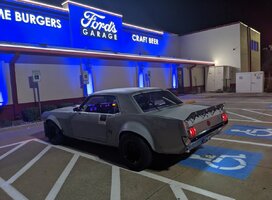
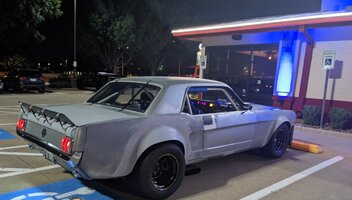
We did attend a local Mustang clubs first car meet. Total disorganization. Lol. The meet was at a restaurant called Ford's Garage. I'll try and post the link. Anyway, between 75-100 cars showed up. Mostly late model Mustangs with those loud ass firecracker sounding exhausts. Crazy. There were a few custom built and survivor cars there as well. Mostly young kids that buy stuff and bolt it on.

Met one kid, 23 years old who had modified an old 66 mustang. Built his own molds and made fiberglass flares. His car was so rotted out when he bought it 4 years ago that he grafted the rear under pan of a 2003 with independent suspension under it. Had a 2005 or so engine and tranny. It's great to see a kid taking up restoring, building old classics. Said he started building cars at 14. Slowed some while in collage then picked it back up.

Anyway, it was hot. We went in for a bite of food and got on the 45 minute waiting list. So since there was a handicap spot up near the front of the restaurant I decided to go fetch the car from the back parking lot where everybody had been meeting for the last three hours. I fired it up and had to drive through a crowd of the kids I mentioned above. They all just stared with their mouths open at the old school deep roar sound coming out of my homemade exhaust system. Lolol. Rump daadaa rump rump! Lololol.

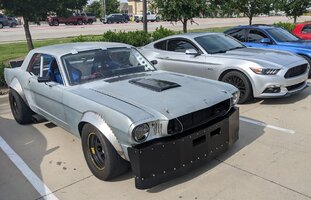
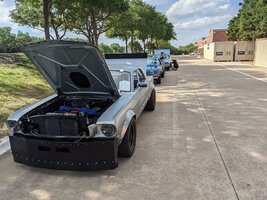
So when we came out after eating, the few cars parked around mine were leaving. SWEET! Time for a picture. Lolol. Here ya go. I have a new screen saver shot now.


BDRAG
PXL_20220717_025038869.jpg PXL_20220717_025020622.jpg PXL_20220717_025051686.jpg PXL_20220714_160215061~2.jpg
 
Top