ooooooooooo

BDRAG, JUST CHECKIN IN....

BDRAG

Well-known member
Lifetime Member
Joined
Aug 26, 2018
Messages
720
Points
93
Location
DALLAS AREA
Roxor Ownership
No longer own
Roxor #
:-(
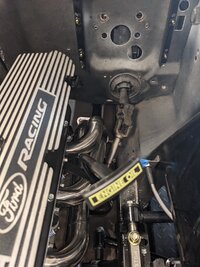
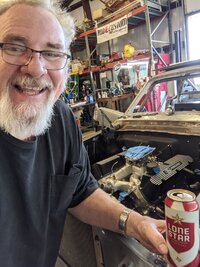
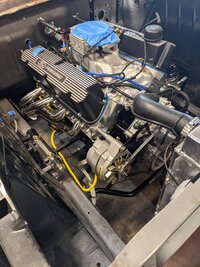
Just a few pics to refresh my mind where we started from. Lol.

PXL_20210417_145549278 (1).jpg PXL_20210418_181541904.jpg
 

BDRAG

Well-known member
Lifetime Member
Joined
Aug 26, 2018
Messages
720
Points
93
Location
DALLAS AREA
Roxor Ownership
No longer own
Roxor #
:-(
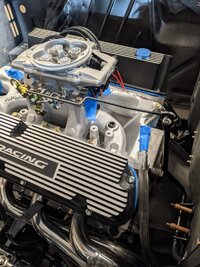
Just a few more. Lol.

Got the throttle body on the motor to build the throttle linkage. Figured I set the newly made black air cleaner on to see if it will look appropriate.

IT DO! Lololol.

BDRAG

PXL_20220127_171402597.jpg PXL_20220127_171418232.jpg
 

BDRAG

Well-known member
Lifetime Member
Joined
Aug 26, 2018
Messages
720
Points
93
Location
DALLAS AREA
Roxor Ownership
No longer own
Roxor #
:-(
02.01/2022 update:

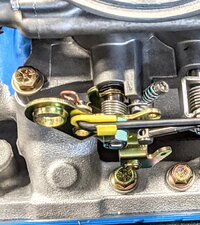
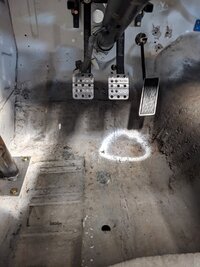
Got my throttle linkage completed. It's just held in with clecos for now. The previous HACKERS welded up the through hole to cabin and all the mounting holes for the re-pop gas pedal assemble. The pivot for the rod mounts on the outside fire wall. So I had to locate and punch that hole and re drill the 3 mounting holes.

Once it was installed and I tried to assemble the gas pedal on the rod I noticed the pedal was about 15 degrees cocked towards the trans hump. WTF?

SO I pulled it back out, heated the linkage with a torch and twisted it to where it is spose to be. Re installed and it's good now.

Then I adapted an old tail gate rod clip from an old Ford truck Pete had in a drawer to be my linkage retainer at the throttle body. Had to drill a hole in the rod for a clip. Put a washer on it and clipped it. Wah Lah. Lol.

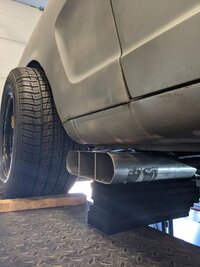
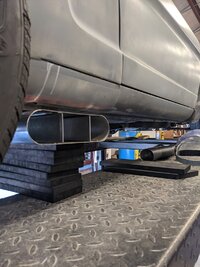
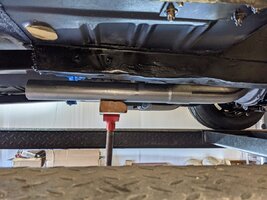
Got started on the exhaust to the header. I had bought a builders kit off Amazon with pre bent pipe bends and some straights. I bought a slightly bigger collector ball fitting so I can run 2.5 inch pipe instead of the 2.25".

It only took 20 minutes to pre fit and cut the components back to where a muffler will be. WOW! I may have to start a muffler shop! Lolol.

I'm going to run a Flowmaster Super 10 with Dual in/out. So the exhaust will blend in the muffler, no need for an X or Y pipe. It's gonna sound Great and Loud. Lolol.

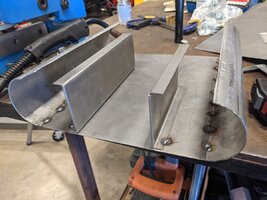
I also started a home made exhaust collector THING so both pipes enter and blend as they exit the car. Not sure how it will work or even survive my welding. Lolol.

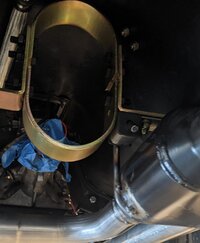
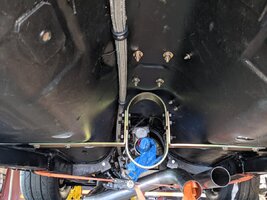
Got the drive shaft hoop cut down to size and got it bolted in place.

Parts ordered, starting wiring this week. That's gonna be my toughest part of the build. I HATE figuring out wiring!

BDRAG

PXL_20220128_202929737.jpg PXL_20220128_202923550~2.jpg PXL_20220128_202950498.jpg PXL_20220129_185638007.jpg PXL_20220129_191745431.jpg PXL_20220129_191755665.jpg PXL_20220130_171503910.jpg PXL_20220130_171452944.jpg PXL_20220130_204132888.jpg
 

BDRAG

Well-known member
Lifetime Member
Joined
Aug 26, 2018
Messages
720
Points
93
Location
DALLAS AREA
Roxor Ownership
No longer own
Roxor #
:-(
Well CRAP!

My buddy Pete's household has a run of Covid! His wife had mild case. Pete now has a mild case. Basically a slight head cold. But they both test positive. So I'm gonna give it till next week before I go back over there to work on the Mustang.

I have parts stuck in shipment due to the weather anyway. Dew Doo.

BDRAG
 

Roxasuras

Well-known member
Lifetime Member
Joined
Mar 10, 2019
Messages
2,201
Points
113
Location
Hurricane, WV, USA
Roxor Ownership
Roxor Owner
Roxor #
2507
Lol, well Sir they say good things take time, and by the looks of it you have a great build on your hands. Look forward to seeing more.

On another note, I tried to order a disc conversion for my CJ, how does that get affected by covid :unsure:
 

BDRAG

Well-known member
Lifetime Member
Joined
Aug 26, 2018
Messages
720
Points
93
Location
DALLAS AREA
Roxor Ownership
No longer own
Roxor #
:-(
Lol, well Sir they say good things take time, and by the looks of it you have a great build on your hands. Look forward to seeing more.

On another note, I tried to order a disc conversion for my CJ, how does that get affected by covid :unsure:
I guess it depends on just how sick the UPS guy is? Lolol.

BDRAG
 

BDRAG

Well-known member
Lifetime Member
Joined
Aug 26, 2018
Messages
720
Points
93
Location
DALLAS AREA
Roxor Ownership
No longer own
Roxor #
:-(
02/08/2022 UPDATE:

Well, the COVID onset at my buddy Pete's has passed and I got back to work on the car today.

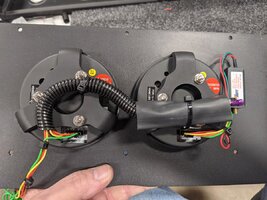
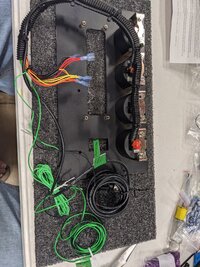
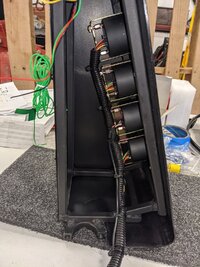
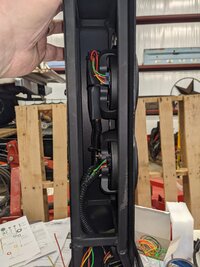
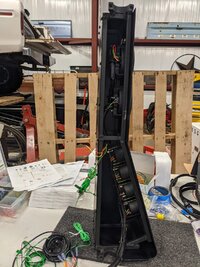
I started the nightmare of the wiring process. Started with the dash pod. Wiring up the gauges

Got to a point where I need some 4 and 6 pin connectors. The ice storm delayed all my online orders from last week. So I got what I could get done till the connectors arrive. I MISS RADIO SHACK!!!!!!

BDRAG

PXL_20220208_174202506.jpg PXL_20220208_184256596.jpg PXL_20220208_191429031.jpg PXL_20220208_192110535.jpg PXL_20220208_192115388.jpg PXL_20220208_192144072.jpg
 

BDRAG

Well-known member
Lifetime Member
Joined
Aug 26, 2018
Messages
720
Points
93
Location
DALLAS AREA
Roxor Ownership
No longer own
Roxor #
:-(
UPDATE 02/12/2022:

OMG! Have I mentioned IHATE WIRING? LOLOOL.

So we have most of the engine, the dash and all the MSD boxes and plugs and wires and more wires with a few more wires with a few deleted wire run to where they go, FOR NOW!

They will all have to come out to finish the paint and such, plug holes, fix this or that. Most of its where it goes.

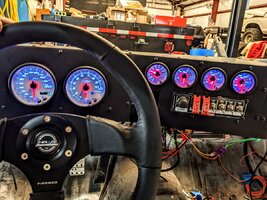
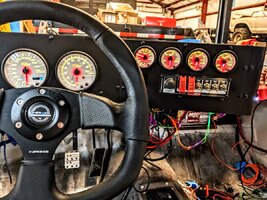
Got the dash wired on the bench and once in the car we added the dash power loop to power. WHALAH!!!!! The dash lit up, the gauges did their sweep thing, the volt meter said 12 volts and I was able to change the lights color a few times. Here is what the dash looks like. The blue is the default color. I then hit the yellow color. Perdy damn cool!!

The build goes on. Ordered more parts, more wire. More to come.

BDRAG

PXL_20220211_223414534.jpg PXL_20220212_213627419.jpg PXL_20220212_213541668.jpg
 

BDRAG

Well-known member
Lifetime Member
Joined
Aug 26, 2018
Messages
720
Points
93
Location
DALLAS AREA
Roxor Ownership
No longer own
Roxor #
:-(
02/18/22 Update:

Well, nothing major accomplished this week other than getting a bunch of wires run to the trunk and getting the alternator figured out. Wired up the fuel pump.

No body I know could tell me what size as far as amp production I needed. I had bought a Summit junk rack billet bracket set up that originally was priced at $150 for $40. Well I now know why it was on the junk rack. Lolol.

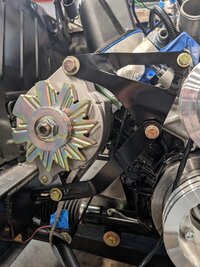
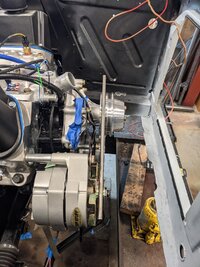
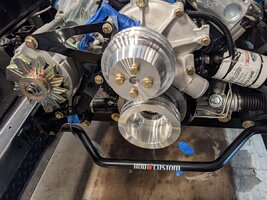
So I decided to just buy a re pop OEM set of brackets. I also just went with a 1 wire GM type in a supposedly Ford housing, regulator built in. Ordered the parts and waited my 3 days.

Got the parts, brackets fit but the lower link where you get your tightening from hit the alternator body. So just so happens, in the junk kit from Summit that there was a small billet part with a few holes and an ear. Well I attached it to the alternator and then attached the lower link. WHALAH!

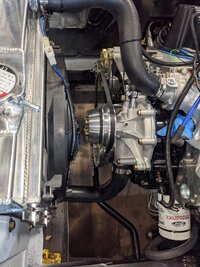
Then after aligning the pulleys, the crank, water pump and alternator I used some of the stand off bushings from the $40 junk kit to get it all where it needs to be.

So a simple 2-3 hour alternator install took about 5-6 plus waiting on the parts. Lolol. Waaaaaaaaa. But! It's very very STOUT. There will be NO flung off belts from the alternator vibrating or wobbling around!

So it's all very well aligned now. In one pic you can see my belt aligning tool. A piece of 1/2 inc steel tubing from some other project of Pete's. Lololol.

The build goes on. Still hope like hell to fire it up before the end of the month. YES THIS MONTH! LOLOLOL.

BDRAG

PXL_20220217_181547025.jpg PXL_20220217_181603054.jpg PXL_20220217_181644922.jpg
 

BDRAG

Well-known member
Lifetime Member
Joined
Aug 26, 2018
Messages
720
Points
93
Location
DALLAS AREA
Roxor Ownership
No longer own
Roxor #
:-(
TODAYS UPDATE:

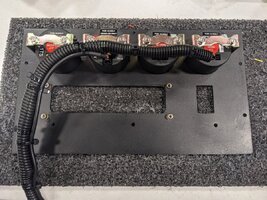
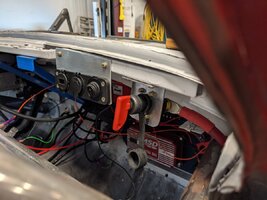
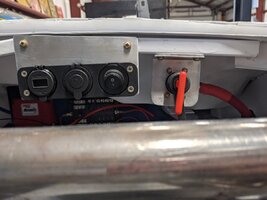
Spent a few hours figuring out where I was going to install the main power disconnect. Cuts out the battery. Also installed a small panel with a 12 volt cigarette lighter plug and a USB port. Gotta have a way to charge your phone and power a gps or other 12 volt things.

Wiring continues tommarra.

BDRAG

PXL_20220218_194624794.jpg PXL_20220218_194618698.jpg
 

BDRAG

Well-known member
Lifetime Member
Joined
Aug 26, 2018
Messages
720
Points
93
Location
DALLAS AREA
Roxor Ownership
No longer own
Roxor #
:-(
02/20/2022 UPDATE:

Wow! Making great progress.

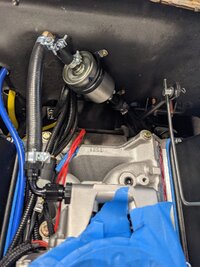
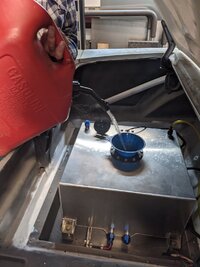
We made sure all the fuel lines from fuel tank to fuel pump were correctly tightened. Lines from fuel pump to firewall are good. Added 3 gallons of fuel to the 15 gallon tank. No leaks! Yippie!

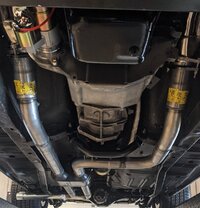
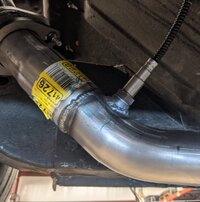
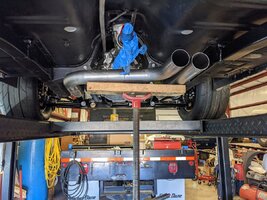
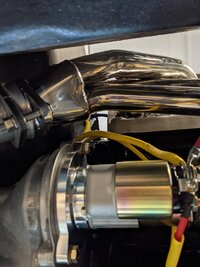
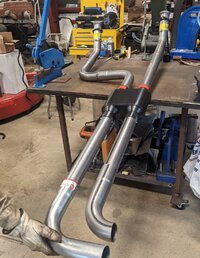
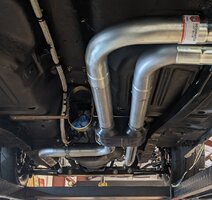
Then we got the exhaust 100 % fit. Tacked it all together, located the area below the headers for the O2 sensor. Marked it. Located where the main exhaust hanger will be mounted. Then we removed the complete exhaust system as one unit.

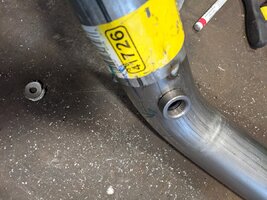
Then I drilled out the pipe for the O2 sensors threaded bung is to go. Then Pete welded it all up. All together the complete exhaust system from the header collectors back only weighs about 30 pounds.

The headers were just in for fitting the exhaust with 4 of the 8 bolts. So while the exhaust was out we removed the headers then re installed them with the gaskets. WHAT A PAIN IN THE ARSS!

So to get the 4 bolts next to the inside radius where the header tube exits the 1/2" flange you have to drop the 4 bolts in, slap the gaskets on the bolts which just so happens have anti seize all over them since the bolts are stainless steel and the heads are aluminum. 1/4 turn here, then there, then drop the greasy bastard screw, start over. ERRRRRRRRR!

It took us about an hour to get the passenger side on. Then on the driver's side we had to bend and shape the dip stick tube around the headers and grind the tube mount flange that goes under one of the 4 dang hard to install bolts to fit. It sucked! But now the dip stick tube is installed and the headers are on the motor and will not be coming off again.

After the headers I grabbed the now one piece complete exhaust and slid it under the headers and then slid it back over a motorcycle strap hanging in the rear. Then raised the exhaust up to the collectors and bolted it in. Wow! That went GREAT! Works as we hoped it would! Lololol.

So that was my 5 hours of work for the day. Pete and I then sat and mulled over the *hit list and crossed off most of what's needed to start the thing up.

All that's left is for my darn on line ordered Optima battery get here, bolt on the water pump and thermostat housing, measure for the correct V - belt, install all the hardware 100% on the crank pulley and alternator. Re install the radiator and then get the correct hoses. The ones the forums say will work Don't!

Run a few wires, tie up loose wires. Test fire the fuel pump, bump the starter to see if it works when ya push the start button. Set the parameters on the EFI and all the MSD boxes. Test run the fan over ride switch just in case the MSD fan controller don't work.

Then dump some oil in after installing a filter, prime the the oil pump until oil flows through out the motor, install the distributor and rum the spark plug wires.

Then it's cross the fingers and hit the button.

More to come!!!

BDRAG
PXL_20220220_154019252.jpg PXL_20220220_172344712.jpg PXL_20220220_172827753.jpg PXL_20220220_200634835.jpg PXL_20220220_200639731.jpg PXL_20220220_200943476.jpg PXL_20220220_201049849.jpg PXL_20220220_201146250.jpg PXL_20220220_201744751.jpg
 

BDRAG

Well-known member
Lifetime Member
Joined
Aug 26, 2018
Messages
720
Points
93
Location
DALLAS AREA
Roxor Ownership
No longer own
Roxor #
:-(
Your build is coming along awesome.
Thank you sir. I spent the day installing the water pump, thermostat housing, battery, bought a belt, WRONG SIZE, plug offs for water pump heater hose outlets. I had ordered some radiator hoses per the mustang gooorooos but they apparently are not as smart as the Roxor community because both hoses they recommend for my mod to a cross flow radiator SUCKED! I spent a hour at the parts house looking up at hoses on the wall till my neck felt so tight I could scream! I said screw it and left. Lolol.

I think I'm about 4 hours of this and that before we try the start button. Fingers crossed.

BDRAG
 

BDRAG
Well-known member
Lifetime Member
Joined
Aug 26, 2018
Messages
720
Points
93
Location
DALLAS AREA
Roxor Ownership
No longer own
Roxor #
:-(
02/22/2022 UPDATE:

Getting very very close to firing this bitoch up! If this crappy weather wasn't coming in tomorrow I would say it would happen tomorrow.

Today I got the fuel system completely run. I will redo the front filter at final install. I don't like the way it looks. To many hose clamps in a small area.

I got the alternator voltage to battery wire and ground wire run, I had to build both cables. I got the ground wire from the battery to the chassis at the back of the car installed which bolts to roll cage tie in bolts. I got the ground cable from the front of the car where it ties in at the roll cage to the negative power bus strip installed.

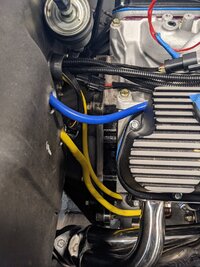
I got the positive cable run from the battery to the switch and tied it in and added a few adel clamps to it. I got all the wires to the other side of the switch that run and tied in and tightened up and I got all the wires run to both ground and power buses all completely tightened up.

I went under the car with it in the air of course, made sure the engine mounts were tight, the tranny mounts are tight, the crank pulley is tight and fastened, the water pump pulley is tight and fastened, the radiator is in installed, the fan shroud is attached to the radiator, I got the hoses run top and bottom to the radiator from the engine and I got the water pump / heater hoses capped off and I got heat shielding on all the wiring from the starter and from the alternator added to the wires so they don't burn up near the headers.

I got the belt on and the alternator tightened. I got the cooling fan wired into the plug and grounded. And there's about 10 other small things that I can't remember that I did.

So what does that leave that needs to be done to start the *itch? I have to tighten down the throttle body to the intake just to snug it in to the correct torque, we need to install a oil filter, add oil, pull the valve covers and run the oil pump with a hand drill. Then we can pump oil through the engine and through the valve train before starting.

After that we can get the number one cylinder to top dead center, set the distributor to cylinder number one and add all the spark plug wires to the correct cylinder I hope. Before connecting the coil wire we're going to turn on power and see that the fuel pump is working and it's pumping fuel, check for leaks, we are going to bump the starter to make sure that it does turn the engine over, and then we will program the boxes to the parameters for this car.

Then we will hook up the coil wire push the button and hope to *itch don't blow up!!!! Lololol.

PXL_20220222_184318641.jpg PXL_20220222_225425547.jpg PXL_20220222_225413739.jpg PXL_20220222_225341930.jpg PXL_20220222_225402790.jpg
 

BDRAG
Well-known member
Lifetime Member
Joined
Aug 26, 2018
Messages
720
Points
93
Location
DALLAS AREA
Roxor Ownership
No longer own
Roxor #
:-(
Second run. Watch Pete jump near end of video when the radiator cap pops out since it was just set in place, not screwed in. Lolol.

I can not explain the exileration, excitement and relief that after all the un knowns thrown together and it runs! I just gave birth! Lolol. My first child.

 
Top