ooooooooooo

HVAC heater

Darstar

Active member
Joined
Jul 2, 2018
Messages
493
Points
43
Location
Marquette, MI, USA
Roxor Ownership
Roxor Owner
Here are my thoughts , for many years big trucks , school buses , off rd equip. And vintage cars as far back as the 20s all used electric fans, I had two on my dashboard or maybe a little higher up, they were on a swivel......worked great , much better than these aftermarket add on hoses etc. ...........This leads to another factor in place on the diesel Roxor ,available heat from engine! On a cold day , say 10 degree f. this little motor will not produce enough heat to satisfy anyone, especially in a drafty vehicle..... the only real fix is a diesel fired heater , like Aqua-Hot and or Wabascio....now if the Rox is only used in the south where it does not get below freezing but for a few hours at night , than these hot water coolant types will be fine. We all up north might experment with blocking off the fan / radiator a bit when it’s really cold.
 

Shortbus

Active member
Lifetime Member
Joined
Aug 26, 2018
Messages
152
Points
28
Location
Phoenix, AZ, USA
Roxor Ownership
Roxor Owner
Roxor #
1247
HTW, good find on the heater it was down to freaking 60° last night in the desert of Arizona!
 
B

Bister

Guest
HTW, good find on the heater it was down to freaking 60° last night in the desert of Arizona!

Oh man I have to move south. lol

Our normal daytime high is 46F and night time low is 28F. Heat wave hitting next Wednesday with a forecasted high of 59F. And these are nice days here. lol.
 

Darstar

Active member
Joined
Jul 2, 2018
Messages
493
Points
43
Location
Marquette, MI, USA
Roxor Ownership
Roxor Owner
You are warmer than upper Mi. For sure ! Last night , 17 fa. .......but then ??59 today with sun. Snow Saturday.....
 

Shortbus

Active member
Lifetime Member
Joined
Aug 26, 2018
Messages
152
Points
28
Location
Phoenix, AZ, USA
Roxor Ownership
Roxor Owner
Roxor #
1247
SNOW???? This is a family forum please do not use four letter words on it, thank you
 

Darstar

Active member
Joined
Jul 2, 2018
Messages
493
Points
43
Location
Marquette, MI, USA
Roxor Ownership
Roxor Owner
SNOW???? This is a family forum please do not use four letter words on it, thank you

Desert rats seem to be fixated with any thought of the white stuff. I never understood that , until I survived several winters in the shadow of Hoover Dam...........” thirty degrees and getting colder, just outside of Boulder “ a period song by Gordon Lightfoot just did not seem right ! It was unnatural, that until I spent several hours trying to get through Flag one winter.....life is all about the extremes. I was reminded of that last night dining and drinking at a local watering hole, while in the background they were playing “ The Wreck of the Edmond Fitzgerald “ ......we deserve that !
 

RoxorYooper

Active member
Founding Member
Joined
Apr 28, 2018
Messages
273
Points
43
Location
UP of Michigan
Roxor Ownership
Roxor Owner
Roxor #
516
I’ll just fab a mount for my big buddy heater, no sense buying another heater when I have 4 blind heaters laying around.
 

mopar93

Member
Lifetime Member
Joined
Sep 17, 2018
Messages
43
Points
18
Location
Lansing, MI, USA
Roxor Ownership
Roxor Owner
Roxor #
1440
Now that I have the cab enclosure installed and with winter coming here in Northern Michigan, a heater makes a nice addition. Here is a brief rundown of how I installed the heater in my Roxor.

enclosure.jpg


This photo shows the heater mounted at the center of the dash and about even with the face of the dash. This seemed to be the best location for this particular heater. I used a Maradyne H-410312 heater. It's available on Amazon for about $130 at the time of this writing.

dash.jpg


For mounting the upper part of the heater, I made some aluminum brackets. These are simple. I used 1/8 x 1 aluminum that I bought at the local hardware store. I cut the length needed and bent it and drilled the holes. The bracket is held to the heater using a #10 sheetmetal screw. It fastens into the slotted hole near the top of the side of the heater. The bracket attaches to the bottom of the dash using #10 machine screws with stop nuts. The dash is too thick to use sheetmetal screws. There is an angle bracket on each side of the heater.

anglebracket.jpg


The lower part of the heater is attached directly to the floor tunnel. The flanges that are part of the heater case only need a slight twist and bend inward to make them fit right against the floor. For fasteners, I used 1/4 x 1 nuts and bolts.

lowermount.jpg


The wiring is routed over to the fuse box under the right side of the dash. I connected the positive wire to fuse F28. This fuse appears to be unused on my Roxor and is a 10 amp fuse. Power to this fuse shuts off with the key which is perfect. There are two factory wires going to this fuse. You want to splice into the wire that is closest to the outer part of the fuse box. For the ground wire, I connected it to an existing ground stud above the fuse box. You will have to add a nut to the stud.

groundstud.jpg


In this photo, you can see the two heater hoses coming through the firewall. Heater hoses come in various colors, I chose black so that it looks OK under the hood since the factory hoses are black. Be sure to use a good quality heater hose. Some will kink too bad when making a bend. You also want good quality hoses since these are routed into the interior and a leak could be bad. The hoses are 5/8ths inch inside diameter. I bought 6 feet of hose so I would have enough for the job. I actually ended up using less than 5 feet of the hose.

hosesinside.jpg


Under the hood, there are a couple of different ways to run the hoses and it all depends on the type of heater you use. Mine has a shut off valve on it. Some heaters do not have a shut off valve. For my heater with the shut off valve, the hoses can only be routed one way, in parallel with the hoses that run to the EGR cooler. For heaters without a shut off valve, the hoses can be run just like I did, or they can be run in series with the EGR cooler hoses. In series means a hose runs from the engine to the EGR cooler, then from the outlet of the cooler to the inlet of the heater, and then from the outlet of the heater back to the engine. In parallel mode like my setup, we have to tap into the two EGR cooler hoses with T-fittings. If we use the "series" mode, closing the valve on the heater will shut off the coolant flow through the EGR cooler and that is not a good thing.

This photo shows how I tapped into the pressure side hose using a T-fitting. I bought the 5/8ths T-fittings at the local NAPA auto parts store.

pressuret.jpg


This photo shows how I tapped into the return hose from the EGR cooler. I cut the hose right where it makes a 90 degree bend and added the T-fitting there.

returnt.jpg


Here you can see how the pressure hose to the heater inlet is routed along side the valve cover. It looks good like this.

pressurehose.jpg


This photo gives a closer look at the firewall where the hoses go through the factory grommets. I cut the center out of the grommets enough so they would slide over the hoses. After cutting them, put them back into the firewall. You'll need to wipe a slight film of lubricant over the hoses so they push through the grommets easily or they'll pop out as you push the hoses through. I lightly wiped WD-40 onto the hoses. It dried later. A little lubricant applied inside the hoses might also make it easier to slide the hoses over the T-fittings.

hosesfirewall.jpg


This heater works quite well and will make it fun to run the Roxor around the county this winter. Our county allows side by sides to run on the roads as long as we stay to the right, allow cars to easily pass, and keep it below 25 mph. We can go anywhere as long as we stay off the federal and state roads. We've taken the Roxor just about everywhere we need to go here.
 

Oakley

New member
Joined
Sep 25, 2018
Messages
5
Points
3
Location
Marquette, MI, USA
Roxor Ownership
Roxor Owner
Thanks for the great pics, also in northern Michigan, Marquette area. Will install my heater similar to yours.
 

BradsRoxor

Member
Joined
Aug 2, 2018
Messages
47
Points
8
Location
Springfield, MO, USA
Roxor Ownership
Roxor Owner
Roxor #
1426
Now that I have the cab enclosure installed and with winter coming here in Northern Michigan, a heater makes a nice addition. Here is a brief rundown of how I installed the heater in my Roxor.

View attachment 1564


This photo shows the heater mounted at the center of the dash and about even with the face of the dash. This seemed to be the best location for this particular heater. I used a Maradyne H-410312 heater. It's available on Amazon for about $130 at the time of this writing.

View attachment 1565


For mounting the upper part of the heater, I made some aluminum brackets. These are simple. I used 1/8 x 1 aluminum that I bought at the local hardware store. I cut the length needed and bent it and drilled the holes. The bracket is held to the heater using a #10 sheetmetal screw. It fastens into the slotted hole near the top of the side of the heater. The bracket attaches to the bottom of the dash using #10 machine screws with stop nuts. The dash is too thick to use sheetmetal screws. There is an angle bracket on each side of the heater.

View attachment 1566


The lower part of the heater is attached directly to the floor tunnel. The flanges that are part of the heater case only need a slight twist and bend inward to make them fit right against the floor. For fasteners, I used 1/4 x 1 nuts and bolts.

View attachment 1567


The wiring is routed over to the fuse box under the right side of the dash. I connected the positive wire to fuse F28. This fuse appears to be unused on my Roxor and is a 10 amp fuse. Power to this fuse shuts off with the key which is perfect. There are two factory wires going to this fuse. You want to splice into the wire that is closest to the outer part of the fuse box. For the ground wire, I connected it to an existing ground stud above the fuse box. You will have to add a nut to the stud.

View attachment 1569


In this photo, you can see the two heater hoses coming through the firewall. Heater hoses come in various colors, I chose black so that it looks OK under the hood since the factory hoses are black. Be sure to use a good quality heater hose. Some will kink too bad when making a bend. You also want good quality hoses since these are routed into the interior and a leak could be bad. The hoses are 5/8ths inch inside diameter. I bought 6 feet of hose so I would have enough for the job. I actually ended up using less than 5 feet of the hose.

View attachment 1571


Under the hood, there are a couple of different ways to run the hoses and it all depends on the type of heater you use. Mine has a shut off valve on it. Some heaters do not have a shut off valve. For my heater with the shut off valve, the hoses can only be routed one way, in parallel with the hoses that run to the EGR cooler. For heaters without a shut off valve, the hoses can be run just like I did, or they can be run in series with the EGR cooler hoses. In series means a hose runs from the engine to the EGR cooler, then from the outlet of the cooler to the inlet of the heater, and then from the outlet of the heater back to the engine. In parallel mode like my setup, we have to tap into the two EGR cooler hoses with T-fittings. If we use the "series" mode, closing the valve on the heater will shut off the coolant flow through the EGR cooler and that is not a good thing.

This photo shows how I tapped into the pressure side hose using a T-fitting. I bought the 5/8ths T-fittings at the local NAPA auto parts store.

View attachment 1573


This photo shows how I tapped into the return hose from the EGR cooler. I cut the hose right where it makes a 90 degree bend and added the T-fitting there.

View attachment 1575


Here you can see how the pressure hose to the heater inlet is routed along side the valve cover. It looks good like this.

View attachment 1577


This photo gives a closer look at the firewall where the hoses go through the factory grommets. I cut the center out of the grommets enough so they would slide over the hoses. After cutting them, put them back into the firewall. You'll need to wipe a slight film of lubricant over the hoses so they push through the grommets easily or they'll pop out as you push the hoses through. I lightly wiped WD-40 onto the hoses. It dried later. A little lubricant applied inside the hoses might also make it easier to slide the hoses over the T-fittings.

View attachment 1580

This heater works quite well and will make it fun to run the Roxor around the county this winter. Our county allows side by sides to run on the roads as long as we stay to the right, allow cars to easily pass, and keep it below 25 mph. We can go anywhere as long as we stay off the federal and state roads. We've taken the Roxor just about everywhere we need to go here.[/QUOTE

Thanks for your post about the heater.
Do you like the windshield you have? Does it bow in at 45 + MPH?
 

Oakley

New member
Joined
Sep 25, 2018
Messages
5
Points
3
Location
Marquette, MI, USA
Roxor Ownership
Roxor Owner
Now that I have the cab enclosure installed and with winter coming here in Northern Michigan, a heater makes a nice addition. Here is a brief rundown of how I installed the heater in my Roxor.

View attachment 1564


This photo shows the heater mounted at the center of the dash and about even with the face of the dash. This seemed to be the best location for this particular heater. I used a Maradyne H-410312 heater. It's available on Amazon for about $130 at the time of this writing.

View attachment 1565


For mounting the upper part of the heater, I made some aluminum brackets. These are simple. I used 1/8 x 1 aluminum that I bought at the local hardware store. I cut the length needed and bent it and drilled the holes. The bracket is held to the heater using a #10 sheetmetal screw. It fastens into the slotted hole near the top of the side of the heater. The bracket attaches to the bottom of the dash using #10 machine screws with stop nuts. The dash is too thick to use sheetmetal screws. There is an angle bracket on each side of the heater.

View attachment 1566


The lower part of the heater is attached directly to the floor tunnel. The flanges that are part of the heater case only need a slight twist and bend inward to make them fit right against the floor. For fasteners, I used 1/4 x 1 nuts and bolts.

View attachment 1567


The wiring is routed over to the fuse box under the right side of the dash. I connected the positive wire to fuse F28. This fuse appears to be unused on my Roxor and is a 10 amp fuse. Power to this fuse shuts off with the key which is perfect. There are two factory wires going to this fuse. You want to splice into the wire that is closest to the outer part of the fuse box. For the ground wire, I connected it to an existing ground stud above the fuse box. You will have to add a nut to the stud.

View attachment 1569


In this photo, you can see the two heater hoses coming through the firewall. Heater hoses come in various colors, I chose black so that it looks OK under the hood since the factory hoses are black. Be sure to use a good quality heater hose. Some will kink too bad when making a bend. You also want good quality hoses since these are routed into the interior and a leak could be bad. The hoses are 5/8ths inch inside diameter. I bought 6 feet of hose so I would have enough for the job. I actually ended up using less than 5 feet of the hose.

View attachment 1571


Under the hood, there are a couple of different ways to run the hoses and it all depends on the type of heater you use. Mine has a shut off valve on it. Some heaters do not have a shut off valve. For my heater with the shut off valve, the hoses can only be routed one way, in parallel with the hoses that run to the EGR cooler. For heaters without a shut off valve, the hoses can be run just like I did, or they can be run in series with the EGR cooler hoses. In series means a hose runs from the engine to the EGR cooler, then from the outlet of the cooler to the inlet of the heater, and then from the outlet of the heater back to the engine. In parallel mode like my setup, we have to tap into the two EGR cooler hoses with T-fittings. If we use the "series" mode, closing the valve on the heater will shut off the coolant flow through the EGR cooler and that is not a good thing.

This photo shows how I tapped into the pressure side hose using a T-fitting. I bought the 5/8ths T-fittings at the local NAPA auto parts store.

View attachment 1573


This photo shows how I tapped into the return hose from the EGR cooler. I cut the hose right where it makes a 90 degree bend and added the T-fitting there.

View attachment 1575


Here you can see how the pressure hose to the heater inlet is routed along side the valve cover. It looks good like this.

View attachment 1577


This photo gives a closer look at the firewall where the hoses go through the factory grommets. I cut the center out of the grommets enough so they would slide over the hoses. After cutting them, put them back into the firewall. You'll need to wipe a slight film of lubricant over the hoses so they push through the grommets easily or they'll pop out as you push the hoses through. I lightly wiped WD-40 onto the hoses. It dried later. A little lubricant applied inside the hoses might also make it easier to slide the hoses over the T-fittings.

View attachment 1580

This heater works quite well and will make it fun to run the Roxor around the county this winter. Our county allows side by sides to run on the roads as long as we stay to the right, allow cars to easily pass, and keep it below 25 mph. We can go anywhere as long as we stay off the federal and state roads. We've taken the Roxor just about everywhere we need to go here.
I just finished my installation exactly like you did on the same exact heater. I can't seem to get any water through the heater. Did you experience this problem.
Thanks
 

mopar93

Member
Lifetime Member
Joined
Sep 17, 2018
Messages
43
Points
18
Location
Lansing, MI, USA
Roxor Ownership
Roxor Owner
Roxor #
1440
I get very hot heat out of mine once the engine gets fully warmed up. Did you close the flow control valve by any chance? You also have to make sure you get all the air bled out of the system. You might have to go through a few warm up and cool down cycles until all the air gets out. When the cooling system builds up pressure, it will push air into the overflow bottle and out to the atmosphere. Leave the radiator cap on tight while the engine cools down. It will pull coolant back in from the overflow bottle to replace the air it pushed out.
 
B

Bister

Guest
They changed the wording on the heater page to include DIY also.
BAEE2E32-6A5E-49C1-9E90-570BFA9D64D2.jpeg
 

Darstar

Active member
Joined
Jul 2, 2018
Messages
493
Points
43
Location
Marquette, MI, USA
Roxor Ownership
Roxor Owner
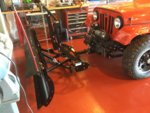
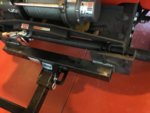
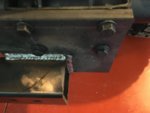
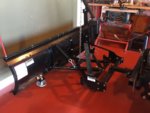
Well , the Plow has landed.! Finally got the Rox fitted to the Snowbear plow. We had to remove the stock bumper for the install......I think it looks better anyway. I will be fitting a tube bumper once I find one I like. Still sorting it out ,...lots of left over parts !

00D02503-C966-4F12-99EF-677CFE44A43E.jpeg 36CD05EE-4AF4-44E8-9BC3-4C096DC7BC60.jpeg 06CF39DA-BBF0-41F5-80A0-7CBD9396380D.jpeg 92A2C5FA-63C0-47CE-8A5C-032800EE8928.jpeg
 

Darstar

Active member
Joined
Jul 2, 2018
Messages
493
Points
43
Location
Marquette, MI, USA
Roxor Ownership
Roxor Owner
So I have not bought a ROXOR yet, but I have been planing my "perfect build" once I get one. Anybody thought about installing a heater in theirs? I live in Michigan and when I get one I feel a heater would be a requirement on those -10 deg days. Thinking about something like the Flex-A-Lite Mojave Heater. If anybody has installed one I would appreciate any info on what worked good and what did not.
View attachment 1329
The Mojave had some bad reviews , I scratched it off the list, there was another reason, not sure what it was now. I have been working with Jegs, they look promising, will see this week end.
 

Oakley

New member
Joined
Sep 25, 2018
Messages
5
Points
3
Location
Marquette, MI, USA
Roxor Ownership
Roxor Owner
I get very hot heat out of mine once the engine gets fully warmed up. Did you close the flow control valve by any chance? You also have to make sure you get all the air bled out of the system. You might have to go through a few warm up and cool down cycles until all the air gets out. When the cooling system builds up pressure, it will push air into the overflow bottle and out to the atmosphere. Leave the radiator cap on tight while the engine cools down. It will pull coolant back in from the overflow bottle to replace the air it pushed out.
We
I get very hot heat out of mine once the engine gets fully warmed up. Did you close the flow control valve by any chance? You also have to make sure you get all the air bled out of the system. You might have to go through a few warm up and cool down cycles until all the air gets out. When the cooling system builds up pressure, it will push air into the overflow bottle and out to the atmosphere. Leave the radiator cap on tight while the engine cools down. It will pull coolant back in from the overflow bottle to replace the air it pushed out.
Well it tuns out the rubber plugs in the inlet and the outlet of the heater need to be removed. I actually called the company about this because the rubber plugs have a hole in the end indicating that they might want the water flow restricted and they agreed!!! Can you believe it, removed them and all good. Email to them tomorrow for wasting my time.
 

Darstar

Active member
Joined
Jul 2, 2018
Messages
493
Points
43
Location
Marquette, MI, USA
Roxor Ownership
Roxor Owner
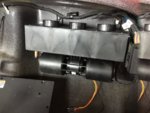
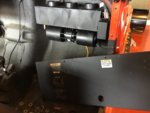
Well, just a teaser at this point. I got my Jegs 3 port three speed mounted , had to relocate fuse box. . Not sure where to route defroster vents.

37DDCB7E-4028-4D0E-B74E-B297CB981561.jpeg 29C61D6A-5D06-4AED-9CC0-B524DE701C5A.jpeg
 

Darstar

Active member
Joined
Jul 2, 2018
Messages
493
Points
43
Location
Marquette, MI, USA
Roxor Ownership
Roxor Owner
Now that I have the cab enclosure installed and with winter coming here in Northern Michigan, a heater makes a nice addition. Here is a brief rundown of how I installed the heater in my Roxor.

View attachment 1564


This photo shows the heater mounted at the center of the dash and about even with the face of the dash. This seemed to be the best location for this particular heater. I used a Maradyne H-410312 heater. It's available on Amazon for about $130 at the time of this writing.

View attachment 1565


For mounting the upper part of the heater, I made some aluminum brackets. These are simple. I used 1/8 x 1 aluminum that I bought at the local hardware store. I cut the length needed and bent it and drilled the holes. The bracket is held to the heater using a #10 sheetmetal screw. It fastens into the slotted hole near the top of the side of the heater. The bracket attaches to the bottom of the dash using #10 machine screws with stop nuts. The dash is too thick to use sheetmetal screws. There is an angle bracket on each side of the heater.

Your hose routing has been very helpful. Question; did you drain coolant first .? And , how do you know which side port is pressure ?
View attachment 1566


The lower part of the heater is attached directly to the floor tunnel. The flanges that are part of the heater case only need a slight twist and bend inward to make them fit right against the floor. For fasteners, I used 1/4 x 1 nuts and bolts.

View attachment 1567


The wiring is routed over to the fuse box under the right side of the dash. I connected the positive wire to fuse F28. This fuse appears to be unused on my Roxor and is a 10 amp fuse. Power to this fuse shuts off with the key which is perfect. There are two factory wires going to this fuse. You want to splice into the wire that is closest to the outer part of the fuse box. For the ground wire, I connected it to an existing ground stud above the fuse box. You will have to add a nut to the stud.

View attachment 1569


In this photo, you can see the two heater hoses coming through the firewall. Heater hoses come in various colors, I chose black so that it looks OK under the hood since the factory hoses are black. Be sure to use a good quality heater hose. Some will kink too bad when making a bend. You also want good quality hoses since these are routed into the interior and a leak could be bad. The hoses are 5/8ths inch inside diameter. I bought 6 feet of hose so I would have enough for the job. I actually ended up using less than 5 feet of the hose.

View attachment 1571


Under the hood, there are a couple of different ways to run the hoses and it all depends on the type of heater you use. Mine has a shut off valve on it. Some heaters do not have a shut off valve. For my heater with the shut off valve, the hoses can only be routed one way, in parallel with the hoses that run to the EGR cooler. For heaters without a shut off valve, the hoses can be run just like I did, or they can be run in series with the EGR cooler hoses. In series means a hose runs from the engine to the EGR cooler, then from the outlet of the cooler to the inlet of the heater, and then from the outlet of the heater back to the engine. In parallel mode like my setup, we have to tap into the two EGR cooler hoses with T-fittings. If we use the "series" mode, closing the valve on the heater will shut off the coolant flow through the EGR cooler and that is not a good thing.

This photo shows how I tapped into the pressure side hose using a T-fitting. I bought the 5/8ths T-fittings at the local NAPA auto parts store.

View attachment 1573


This photo shows how I tapped into the return hose from the EGR cooler. I cut the hose right where it makes a 90 degree bend and added the T-fitting there.

View attachment 1575


Here you can see how the pressure hose to the heater inlet is routed along side the valve cover. It looks good like this.

View attachment 1577


This photo gives a closer look at the firewall where the hoses go through the factory grommets. I cut the center out of the grommets enough so they would slide over the hoses. After cutting them, put them back into the firewall. You'll need to wipe a slight film of lubricant over the hoses so they push through the grommets easily or they'll pop out as you push the hoses through. I lightly wiped WD-40 onto the hoses. It dried later. A little lubricant applied inside the hoses might also make it easier to slide the hoses over the T-fittings.

View attachment 1580

This heater works quite well and will make it fun to run the Roxor around the county this winter. Our county allows side by sides to run on the roads as long as we stay to the right, allow cars to easily pass, and keep it below 25 mph. We can go anywhere as long as we stay off the federal and state roads. We've taken the Roxor just about everywhere we need to go here.
 
Top