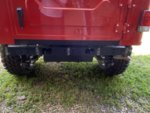
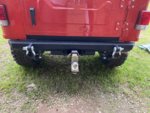
I got my rear bumper installed over the weekend.
I trimmed off the stock bumper plate so that the new Smittybilt bumper would cover it. I also cut off the bottom tabs on the new bumper, ground them smooth, and touched it up with some primer and Rustoleum pebble finish paint; it actually blended very good.
If you look at the picture of the OEM bumper plate, I used the eight holes that you can see primer on (the primer in the center was just to cover where I used a scribe for marking center). The four outer holes are new ones I drilled. The four to the inside are stock holes that are reinforced on the back with the OEM gusset attaching the stock plate to the frame. I drilled those out to use 3/8" bolts. I drilled and tapped the bumper, which is 1/4" steel. I considered using 1/2" bolts but taping 1/4" steel for 1/2-13 bolts would not give me many threads and would possibly be weaker than the 3/8".
This seems like a fairly sturdy mounting solution since I will only be using it to pull a small utility trailer or my aluminum boat.


