txroadkill
Well-known member
- Joined
- Oct 28, 2018
- Messages
- 1,336
- Points
- 113
- Location
- Texas
- Roxor #
- 2498
- Roxor Ownership
- Roxor Owner
Since installing the winch I’ve needed a better battery. About 3 months ago I had to roll start the Roxor out if the barn. The battery didn’t have enough juice to crank it over. Then a few weeks later I had to jump it. The battery stayed up since cause it’s been used daily or weekly. But the initial starts have been slower than normal. So I decided to swap it out today.
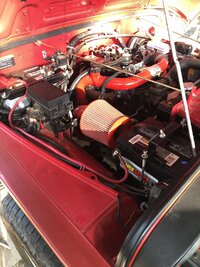
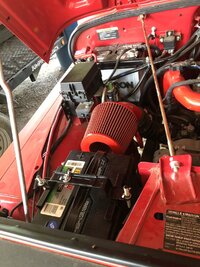
Upon removal I noticed the sides of the stock battery bulged out a little. Not a good sign, it was time to swap. i put an agm 34/78 battery in it’s place. I had wanted an Odyssey 34/78 PC1500 due to previous experiences with this battery but nobody had one local and the economy being what it is I cheaped out and put an O’Reilly’s Super Start 37/78 AGM in it. Figured if I had problems I can swap it easier plus it’s about $100 cheaper at $199.99. It has I believe 750 CCA which is quite a bit more than the stock with 580. While I don’t expect this battery to last as long as the Odyssey it should last a lot longer than the factory battery.
The 34/78 is almost a direct swap. It fits the tray just fine but the hold downs must be modified. I was hoping the stock hold downs could be removed easily for new ones to be fabbed up. That was not the case. The hold down bolts are riveted onto the tray and must be ground off. Being that I was limited to tools at the house i decided not to grind them off and spend time going back into town looking for new tie down bolts or trying to modify these to be shorter. I had hoped that they were clipped on and could be moved down into the hole below the stock placement. I didn’t discover this until I had the battery tray removed. Removal was 4 bolts on the firewall and one under the tray.
With the tray removed I put the new battery in it. It fit well, well enough if I had one of those battery hold down wedges I could have made that work. Not having one nor wanting to go chase one down and make it work I decided to thread the factory hold down bolts. It will take a M8x1.25 die to do it. There’s lots to thread but I went ahead and left it alone and didn’t want to cut it down so it’s easier to start the nut and I can go back to the factory style tie down if necessary.

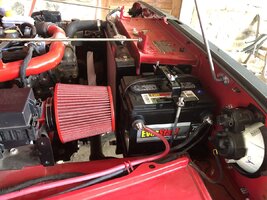
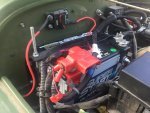
Here you can see the newly threaded rod on the negative side while the positive side hasn’t been threaded. Between the shorter battery height and moving the rod vertical it makes for a tall set up. But have no fear cause even vertical there is plenty of height under the hood.

So I get both sides threaded and the tray bolted back up then it was time to put the new battery in. I had to grind the center of the negative terminal where it comes together. Apparently the new battery had a slightly smaller diameter negative terminal vs factory and wouldn’t tighten down sufficiently. On the terminal you can see a small flat area projecting out where the bolt goes across it. Remove that bolt and grind it flush with a dremal and you now have a terminal that can fully clamp on the smaller post. It wasn’t much to grind off but it was enough. Easier than replacing the terminal end.

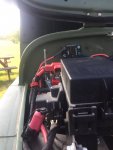
After putting it in and getting the cables connected you must reroute the cables that used to clip on the factory hold down. I was able to get one end clipped on the negative side and just let the positive side dangle as I couldn’t get it to clip anywhere else

The nice thing about the 34/78 battery is your winch can bolt straight to the side terminals. The factory terminals are kinda dinky and the winch will draw lots of amps. Not a good situation as you don’t want to melt the terminals clamps down nor do you want to starve your winch for power. So the easiest and neatest solution IMO is the 33/78 battery.
This mod is very easy and definitely worth the time. I believe it took me about an hour to do. Your gonna need a 10mm for the battery cables, 12mm socket and wrench for the hold down brackets, and a 13mm if you choose to remove the tray. The new bolts I bought for the side terminals took an 8mm. And of course an M8x1.25 die if you choose to add threads to the factory hold down bolts. With many Roxors hitting the 2-3 yr mark the factory batteries will be giving up their lease on life soon. I hope this helps some of y’all out and possibly gives you ideas to expand upon and improve the execution of the battery swap.
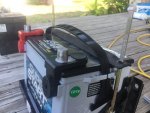


Upon removal I noticed the sides of the stock battery bulged out a little. Not a good sign, it was time to swap. i put an agm 34/78 battery in it’s place. I had wanted an Odyssey 34/78 PC1500 due to previous experiences with this battery but nobody had one local and the economy being what it is I cheaped out and put an O’Reilly’s Super Start 37/78 AGM in it. Figured if I had problems I can swap it easier plus it’s about $100 cheaper at $199.99. It has I believe 750 CCA which is quite a bit more than the stock with 580. While I don’t expect this battery to last as long as the Odyssey it should last a lot longer than the factory battery.
The 34/78 is almost a direct swap. It fits the tray just fine but the hold downs must be modified. I was hoping the stock hold downs could be removed easily for new ones to be fabbed up. That was not the case. The hold down bolts are riveted onto the tray and must be ground off. Being that I was limited to tools at the house i decided not to grind them off and spend time going back into town looking for new tie down bolts or trying to modify these to be shorter. I had hoped that they were clipped on and could be moved down into the hole below the stock placement. I didn’t discover this until I had the battery tray removed. Removal was 4 bolts on the firewall and one under the tray.
With the tray removed I put the new battery in it. It fit well, well enough if I had one of those battery hold down wedges I could have made that work. Not having one nor wanting to go chase one down and make it work I decided to thread the factory hold down bolts. It will take a M8x1.25 die to do it. There’s lots to thread but I went ahead and left it alone and didn’t want to cut it down so it’s easier to start the nut and I can go back to the factory style tie down if necessary.
Here you can see the newly threaded rod on the negative side while the positive side hasn’t been threaded. Between the shorter battery height and moving the rod vertical it makes for a tall set up. But have no fear cause even vertical there is plenty of height under the hood.
So I get both sides threaded and the tray bolted back up then it was time to put the new battery in. I had to grind the center of the negative terminal where it comes together. Apparently the new battery had a slightly smaller diameter negative terminal vs factory and wouldn’t tighten down sufficiently. On the terminal you can see a small flat area projecting out where the bolt goes across it. Remove that bolt and grind it flush with a dremal and you now have a terminal that can fully clamp on the smaller post. It wasn’t much to grind off but it was enough. Easier than replacing the terminal end.
After putting it in and getting the cables connected you must reroute the cables that used to clip on the factory hold down. I was able to get one end clipped on the negative side and just let the positive side dangle as I couldn’t get it to clip anywhere else
The nice thing about the 34/78 battery is your winch can bolt straight to the side terminals. The factory terminals are kinda dinky and the winch will draw lots of amps. Not a good situation as you don’t want to melt the terminals clamps down nor do you want to starve your winch for power. So the easiest and neatest solution IMO is the 33/78 battery.
This mod is very easy and definitely worth the time. I believe it took me about an hour to do. Your gonna need a 10mm for the battery cables, 12mm socket and wrench for the hold down brackets, and a 13mm if you choose to remove the tray. The new bolts I bought for the side terminals took an 8mm. And of course an M8x1.25 die if you choose to add threads to the factory hold down bolts. With many Roxors hitting the 2-3 yr mark the factory batteries will be giving up their lease on life soon. I hope this helps some of y’all out and possibly gives you ideas to expand upon and improve the execution of the battery swap.


