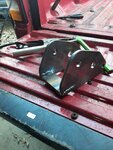
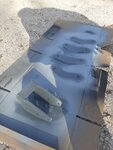
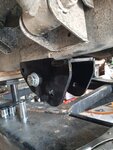
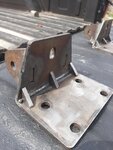
ooooooooooo

Max Travel YJ spring kit install

Cloud

Active member
Lifetime Member
Joined
Oct 25, 2020
Messages
219
Points
28
Location
Freedomland
Roxor Ownership
Roxor Owner
Roxor #
6527
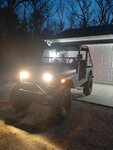
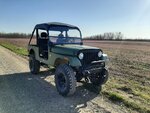
Greetings earthlings, I intend to use this post to showcase the install of the only YJ spring kit currently available for our roxors.

This kit is extremely well thought out and its beauty lies in it's simplicity. However, without any formal instructions and only pictures of a mostly finished product to go by, I was left confused on some parts of the install. I am not a mechanic, fabricator, engineer... I'm literally just a guy that likes to take stuff apart and look at it to see how it works. This has led me to really enjoy wheeling because I break stuff, and then get to take stuff apart.

This one is for the somewhat savvy layman. It's a work in progress and I'll be leaving myself notes in the thread along the way for future revision. I'm taking tons of pictures, but if you have a picture that better shows the subject I'm discussing, please share with me via PM I'll add it to the list and credit you where applicable.

20210316_181842.jpg


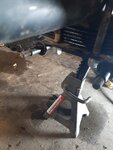
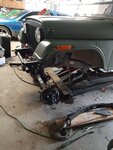
Step 1: lift it up and remove the front axle.

You'll need 13/16" socket to pull the wheels. 20mm might work but who has one of those?

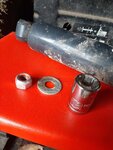
Remove the sway bar end links from spring mount using a 19mm socket.

20210318_132214.jpg


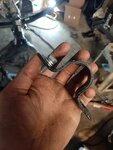
I'm throwing mine in the trash, but you could get longer end links if you wanted. This could be beneficial for a pavement princess, but my Jezebel is a dirty girl so goodbye sway bar. The sway bar bracket comes off with a 16mm socket.

20210318_132252.jpg


Disconnect shocks with an 18mm socket once removed these are to be donated to the scrap pile. They should slide right off.

20210318_111715.jpg


Disconnect calipers, I chose the leave them on the axle and disconnect the braided steel line from the caliper(###). This allows the fluid to drain only into a drain pan and not onto the paint and gets the caliper out of the way during the install.

Disconnect the tie rods with a 19mm socket and stow them up on themselves.

20210318_212155.jpg


A Pittman arm puller wasn't necessary for me but is a wise choice for this. I put the castle nut on about halfway and tapped it with a hammer. Castle nut prevents mushrooming the tie rod stud

20210318_111812.jpg


I then lowered the vehicle so that the front axle rested on Jack stands. From here I had to use hand tools to remove the nuts holding the driveshaft in place. It's possible a wobble socket could get in there, but I don't have any in this shop. I used a pair of 13mm (rear shaft uses 14mm) combination wrenches. The nuts are nylocks so it wasn't difficult to remove.

20210318_111331.jpg


With the driveshaft pulled, gently set it somewhere safe and remove the bolts holding the factory springs to the frame with a 24mm socket. Then do whatever is necessary to free the spring from the frame. I used a pry bar. Don't rock the vehicle or it might fall off the lift.

20210318_111127.jpg


Disconnect the hand brake via your preferred method. It's pretty straightforward and I didn't take pictures. Pro tip: remove the muffler and tailpipe to make the handbrake cable removal easier. I opted to leave the cable attached to the drums and remove the pulley from the roxor.

Support the pinion and lift the vehicle away from the axle. Viola, disconnected axle.

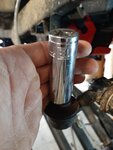
From here undo the bolts holding the spring mount to the u bolts with a deep 19mm socket.

20210318_111405.jpg


I had to polish the centering pin hole on the front axle as the yj springs centering pin were the EXACT diameter of the hole on the axle. With proper equipment, or another set of hands this may not have been necessary.


@Max A. Genius level attention to detail is showcased with this kit.

More nut sizes to probably come soon.
20210316_181842.jpg 20210318_132214.jpg 20210318_132252.jpg 20210318_111715.jpg 20210318_111812.jpg 20210318_111127.jpg 20210318_111331.jpg 20210318_111127.jpg 20210318_111405.jpg 20210318_212155.jpg
 
Last edited:
Cloud

Active member
Lifetime Member
Joined
Oct 25, 2020
Messages
219
Points
28
Location
Freedomland
Roxor Ownership
Roxor Owner
Roxor #
6527
20210318_145932.jpg


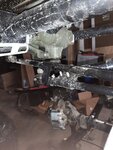
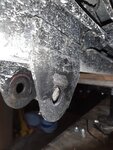
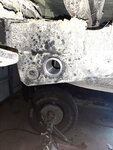
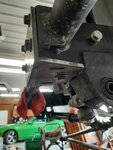
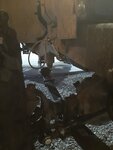
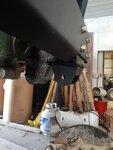
There are a total of 4 tabs that need to be cut off. They appear to be welded on by man, not machine. I used a cutoff tool to slice the welds, one came right off and the other three needed additional persuasion. Get the surface flat so the spring mounts have a flat mounting surface.

20210318_151813.jpg


I recommend mocking up the spring mounts about 10,000 times like I did. This is a rear mount.

20210318_151823.jpg


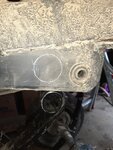
I measured 2.5" forward of the stock mount location. Measured center to center and ensured both sides were marked identical.

20210318_203437.jpg


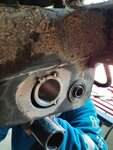
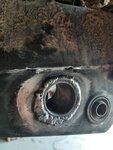
Passenger side (2nd attempt) went off without a hitch. Perfectly level with no adjustments required. I had to adjust the driver side significantly. I used a cheap DeWalt 2" hole saw on the driver side, and a much better quality hole saw, with a neat pilot centering trick, fight the passenger side.

20210321_141723.jpg


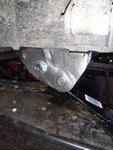
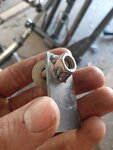
As per instructions, weld the nut to this plate. Because every roxor is hand built, your angles may be different than mine.

14mm
20210321_141743.jpg


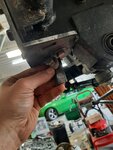
Mine appears to be 90° Mahindra waxed the factory bumper cover bolts, I strongly suggest greasing the threads. They'll be in and out a lot here.

20210321_141730.jpg


Pay attention here to the orientation. There is a short side and a long side.

20210321_141734.jpg


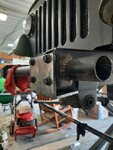
Before you affix the front plate, slide the plate with welded nut onto the bumper rail. There is already an opening, use the bolt to hold this plate in place so you can tack the plates together. Genius!

20210321_124423.jpg

Oops

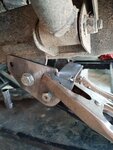
Prep for welding, my buddy used a 110 buzz box so a clean surface was necessary. I do not recommend this method, the steel is pretty thick and was pushing the boundaries of 110volts. I did not drop the fuel tank.

Remove the muffler and tail pipe if you haven't already.


20210321_133629.jpg


Ready for paint!

Like I said; this one's for the layman

20210318_145932.jpg 20210318_151813.jpg 20210318_151823.jpg 20210318_203437.jpg 20210321_141723.jpg 20210321_141743.jpg 20210321_141730.jpg 20210321_141734.jpg 20210321_124423.jpg 20210321_133629.jpg
 
Last edited:
Cloud

Active member
Lifetime Member
Joined
Oct 25, 2020
Messages
219
Points
28
Location
Freedomland
Roxor Ownership
Roxor Owner
Roxor #
6527
20210321_124417.jpg


WARNING: These mounts were welded up apart from the springs. This was a mistake as the mounts warped and required a mini sledge to persuade them into place. This oversight cost me hours of frustration and almost a finger, again...

But I learned some cool stuff so whatever, worth it. This is my first time ever touching leaf springs or removing a drive shaft. Experience and knowledge is very helpful here.

20210321_165313.jpg


These pictures tell more than my words can. In short; weld that *hit up.

20210321_173741.jpg


Cold galvanizing compound

20210321_165333.jpg


Rust-oleum automotive enamel looks great until you beat on it with a hammer.

20210322_150138.jpg


I made gussets, this kit does not include these gussets. They're likely unnecessary.

20210321_124417.jpg 20210321_165313.jpg 20210321_173741.jpg 20210321_165333.jpg 20210322_150138.jpg
 
Last edited:
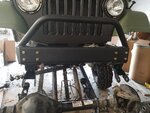
Cloud

Active member
Lifetime Member
Joined
Oct 25, 2020
Messages
219
Points
28
Location
Freedomland
Roxor Ownership
Roxor Owner
Roxor #
6527
20210323_162451.jpg


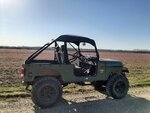
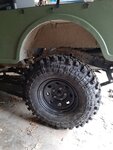
These particular 35s measure 34.25" diameter. Probably could run 37s

20210327_171308.jpg
20210327_173159.jpg


20210401_192755.jpg


20210327_173931.jpg


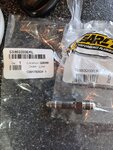
Need 2xbanjos, 2x90s, and 3x brake lines. Not pictured here (low quality picture below) is a straight bulkhead fitting needed for the rear brake line. The roxor uses -3AN fittings.

Shout out to @Colderweather86 for figuring out the lines and fittings.

As far as I can tell I'm the only one that extended the rear line other than @Max A. Who redid everything south of the power train.

11 13 13 3/8 11/16 wrenches needed for the brake lines.

20210327_174319.jpg


At less than 300 miles my stock brake lines had been rubbed down to the braided steel. The rubber coating was completely gone where they contacted the tires.

20210327_175023.jpg


20210327_175103.jpg


20210330_160850.jpg


20210330_192728.jpg


At this time I'm waiting on a -3an coupler to fit the extended rear line into the T fitting.

20210323_162451.jpg 20210327_171308.jpg 20210327_173159.jpg 20210327_173931.jpg 20210327_174319.jpg 20210327_175023.jpg 20210327_175103.jpg 20210330_160850.jpg 20210330_192728.jpg 20210401_192755.jpg
 
Last edited:
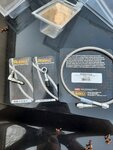
Cloud

Active member
Lifetime Member
Joined
Oct 25, 2020
Messages
219
Points
28
Location
Freedomland
Roxor Ownership
Roxor Owner
Roxor #
6527
At this point, all necessary information has been added to this write-up.

I'm running bilstein 33-104645 on all four corners.

Rubicon express re1430 springs on all four corners with re2790 (1 unit of this part number provides bushings for two springs. I needed two units) main eye bushings.


20210327_194931.jpg


It ain't over yet, but this feels good

20210327_194931.jpg
 
Last edited:
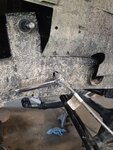
Cloud

Active member
Lifetime Member
Joined
Oct 25, 2020
Messages
219
Points
28
Location
Freedomland
Roxor Ownership
Roxor Owner
Roxor #
6527
20210327_203801.jpg


You can see in this picture that I'm not done yet. Chief among the things that are not finished here is the spring mounts brackets require a bolt drilled through the factory spring brackets to hold it in place.

In this picture you can see mine are hanging down really far.

You would do well to ensure these are resting against the bottom of the frame rails before drilling the holes or measuring your new front driveshaft length. In this picture my front axle is positioned 3.5" further forward than when it's all done up properly.

I lucked out that my driveline shop happened to have thick walled tubing from a different driveshaft that they were able to use. Our driveshaft tubes are thicker wall than typical. If the shop didn't have the right thickness on hand, I'd have waited until June for proper thickness tubing.

20210327_203801.jpg
 
Last edited:
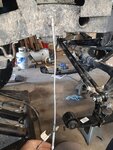
Cloud

Active member
Lifetime Member
Joined
Oct 25, 2020
Messages
219
Points
28
Location
Freedomland
Roxor Ownership
Roxor Owner
Roxor #
6527
20210327_203733.jpg


Still much to do but with this comment reserved for me that gives me room for 80 photos and about a book worth of text. So feel free to comment now if you wish. The write up will be completed some day. I just started a pretty intensive job training so I can learn to make that gubmint chee$e if you know what I mean.

I'd say a competent professional could knock this out in 3 days if they started with every part and every necessary tool.

I started with nearly every required part and I'm probably 90% finished after about 8 days of actual effort.

Part numbers and whatnot to are all recorded. I used exactly what the manufacturer suggested.

I do have an engine lift so I'm gonna try not to flip it when I check the suspension travel. The tires rub the springs with aggressive steering as it sits. I've adjusted nothing, don't even have the shocks on or brakes hooked up.

20210403_175649.jpg


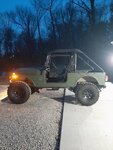
DUN with suspension mods

20210403_175704.jpg


20210327_203733.jpg 20210403_175649.jpg 20210403_175704.jpg
 
Last edited:
AZROX

Well-known member
Joined
Oct 12, 2019
Messages
331
Points
63
Location
Phoenix, AZ, USA
Roxor Ownership
Roxor Owner
@Cloud: the tall tires look great.

With the setup you have now (lift, tall and skinny tires), what is the steering radius?

Just wondering if the really tall and really skinny tires you mounted still rub on the leafs as you turn left and right.

Can you adjust the steer stops to get a tighter radius than factory setup (no lift and stock tires)?
 

Cloud

Active member
Lifetime Member
Joined
Oct 25, 2020
Messages
219
Points
28
Location
Freedomland
Roxor Ownership
Roxor Owner
Roxor #
6527
@Cloud: the tall tires look great.

With the setup you have now (lift, tall and skinny tires), what is the steering radius?

Just wondering if the really tall and really skinny tires you mounted still rub on the leafs as you turn left and right.

Can you adjust the steer stops to get a tighter radius than factory setup (no lift and stock tires)?
Steering radius is pretty bad. I didn't adjust the stops at all and Im definitely rubbing on the leafs. I can turn tight enough for most trails so I'm not worried. No trouble in town driving
 

Dan H.

Active member
Lifetime Member
Joined
Jan 5, 2021
Messages
129
Points
43
Location
Yuba CIty Ca.
Roxor Ownership
Roxor Owner
Roxor #
2019
Excellent documentation here. Thanks for sharing. I will be adding the brake line info to my cross reference list. I would be interested in how the suspension kit handles the bumps?
 

Colderweather86

Well-known member
Lifetime Member
Joined
Apr 20, 2020
Messages
724
Points
63
Location
Palmer, AK, USA
Roxor Ownership
Roxor Owner
Roxor #
7262
Excellent documentation here. Thanks for sharing. I will be adding the brake line info to my cross reference list. I would be interested in how the suspension kit handles the bumps?
It's a whole different animal. I can fly down desert trails and it handles the dips and uneven terrain with ease.
 

Cloud

Active member
Lifetime Member
Joined
Oct 25, 2020
Messages
219
Points
28
Location
Freedomland
Roxor Ownership
Roxor Owner
Roxor #
6527
Excellent documentation here. Thanks for sharing. I will be adding the brake line info to my cross reference list. I would be interested in how the suspension kit handles the bumps?
Major improvement. I haven't done anything crazy requiring suspension articulation yet though. Those tires are incredible and grip on some pretty gnarly mud slopes
 

Holleyb19

New member
Joined
Apr 8, 2019
Messages
14
Points
3
Location
New Orleans, LA, USA
Roxor Ownership
Looking to buy
I got my kit in, and thanks to your documentation I am able to mock up the parts.
  • Could you post a photo of the rear spring mount for the front axle completed and the front spring mount for the rear axle? I would just like to see the final installation.
  • The 4 smaller sleeves fit between the factory spring mounts to prevent crushing correct?
  • And only because I wanna be sure, the front spring mount tabs for the front axle are the four that need to be removed right?
  • You didnt need to weld in any of the new brackets (they are bolted in only)?
Thanks in advance!
 

Cloud

Active member
Lifetime Member
Joined
Oct 25, 2020
Messages
219
Points
28
Location
Freedomland
Roxor Ownership
Roxor Owner
Roxor #
6527
I got my kit in, and thanks to your documentation I am able to mock up the parts.
  • Could you post a photo of the rear spring mount for the front axle completed and the front spring mount for the rear axle? I would just like to see the final installation.
  • The 4 smaller sleeves fit between the factory spring mounts to prevent crushing correct?
  • And only because I wanna be sure, the front spring mount tabs for the front axle are the four that need to be removed right?
  • You didnt need to weld in any of the new brackets (they are bolted in only)?
Thanks in advance!

Post 2 picture two. Post 3 pictures 1 and 4 are all of the front mount of the rear axle spring.

I do not believe I have any good pics of the front, but I'll check.

Sleeves: you are correct, see post 3 picture 4. The sleeve is installed in that picture.

Spring mount tabs: I believe you are incorrectly referencing the original REAR spring mounts for the front axle (see post 2 picture 1) in that image you can see what I believe you are incorrectly referencing, and also what I am intending to demonstrate.

Post 2 picture 1 is a picture of the "final product" this picture was taken AFTER the tabs were removed.

Post 2 pictures 6,7, and 8 include the original front spring mount for the front axle. Note the difference. Removing these mounts is unnecessary and ill advised if you think you'll ever return to the lower performance original suspension. I'll never return to the factory suspension, but I still didn't remove them.

The only thing welded to the frame of the door was the sleeve through the frame in post 2 pictures 3,4,9, and 10.

I apologise for the fact that I am unable to properly organize anything in my life. This thread is likely the chronological order of the actual install. I got the front disassembled, then the rear. Then I drilled the rear right, completed part of the front, finished up the rear 99% completed the front 100% then the rear. Then took the front apart and installed a winch plate and bull bars. Then I became very annoyed that I didn't install the skid plate while the axles were off... That's just how my brain works. I'll start a brake job, then go cook dinner and finish the job while I'm "walking the dog" then wake my dog up and go play. I then will forget that I never got the brakes bedded and scared the living *hit out of myself while looking at a cupholder of "extra" bolts...

You would be terrified if you knew what I did for work and would likely never visit a major city again
 
Top